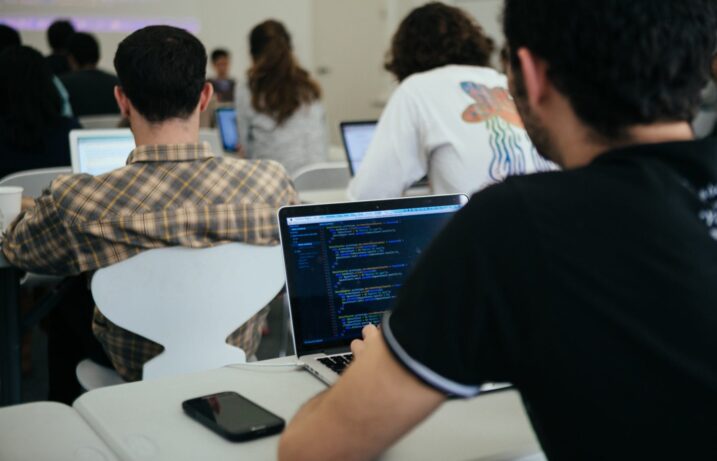
The following is a guest post by Brad Wheel and originally appeared on his blog. Brad is currently a student a The Flatiron School. You can follow him on twitter here. Look out for part 2 soon!
I recently discovered a ruby gem that acts as a wrapper for the Mac Core Audio API (it’s written in C) and decided to play around with it. I started by using an example from the gem’s GitHub repo and just tinkered until I ended up with something cool. You can find that repo here.
A few weeks ago I built a single purpose website for my school displaying whether or not it was open or closed at the time. A lot of people like to arrive early and it was becoming a nuisance to have to text the instructors every morning, so I thought a website might make it easier. The site was a hit, but I thought it could get better. Avi, the instructor, and I thought it would be cool if we could automate the status update by using sound to detect whether or not people were in the room. Here is the script that I wrote.
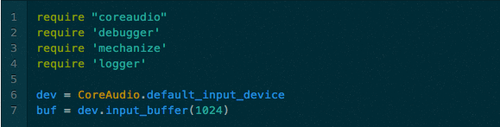
First, I had to require the coreaudio, debugger, and logger gem. I also required the mechanize gem for sending a POST request to the website. I set the variable dev to the default audio input device (the internal microphone on my mac) and then set the variable buf to the buffer size I thought appropriate. Here is a good explanation of buffer inputs if you’re unfamiliar with them.
Next, I kept the output from the example the same so that when it is going through the loop I’m about to set it will start by printing out “RECORDING…”. I then set x = 0 for the while loop.

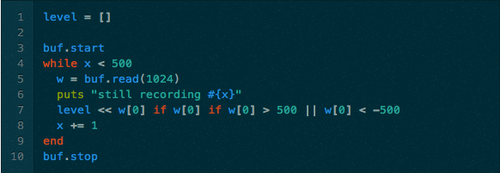
I instantiate a new array called level, which will keep track of all the times the input records over a certain volume. Later, I will use this array to set my baseline.
Next, I call buf.start to begin recording. Then I set a while loop to run for a specific amount of time and to push any sound levels above 500 into the “level” array that I created earlier. After the loop, I stop the recording by calling buf.stop
Now that we have our array full of of instances and volume levels above the 500 that I specified, we are going to cycle through them and get the sum of the array. This sum is going to be my measurement for whether or not students are in the room.

As you can see, It’s pretty easy (and fun) to use the CoreAudio gem. You can do a lot of things with this gem if you choose to, so in the next coming weeks I will be posting more cool examples for you to play around with.
COMING SOON – An article on using mechanize to easily send HTTP requests