The following is a guest post by Basar Akyelli and originally appeared on his blog. Basar is currently in the iOS-000 class at The Flatiron School. You can follow him on Twitter here.
This week at Flatiron School, we learned how to create custom UIMapView annotations using the MKAnnotation protocol. Even though at first I found it to be more complicated than it should be, it started to make more sense after I used it a few times.
Let’s build a single view application that shows our custom MKAnnotation object on a map.
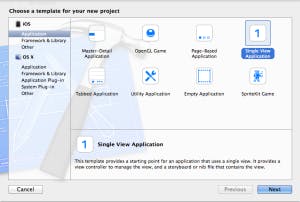
On Xcode, let’s create a new Single View application:
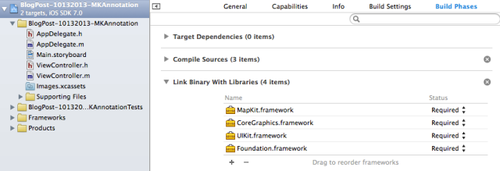
Since we’ll be using Map Kit methods and objects, we should add the Map Kit framework to our project.
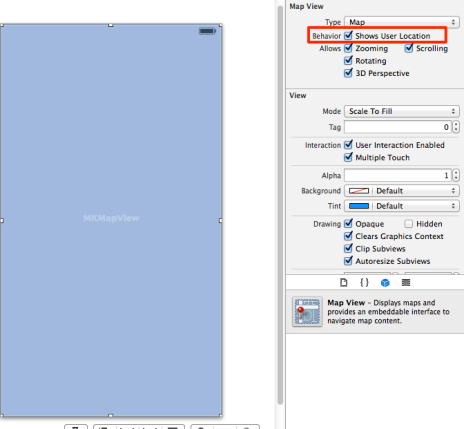
Onto our main View, let’s drag and drop a Map View and check its “Shows User Location” behavior:
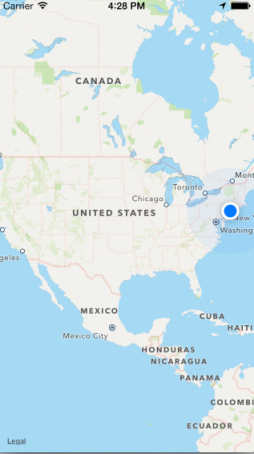
If we run our application now, this is what we get:
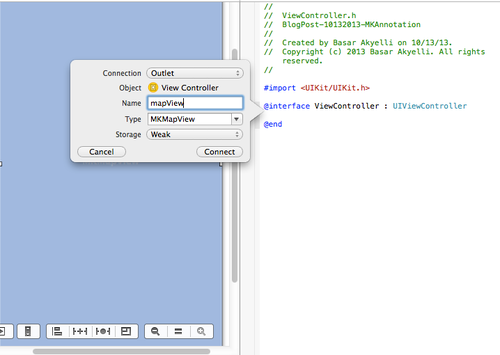
Let’s zoom to our location. Not that hard. We need to create an outlet to our Map first. Just Control-drag your map to the ViewController.h file and create an IBOutlet. Let’s name our outlet m**apView:**
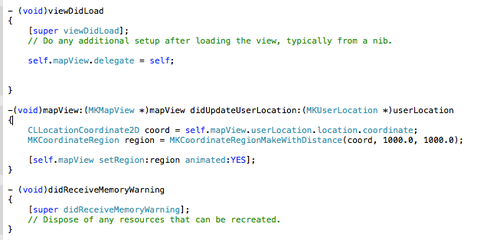
Don’t forget to import <MapKit/MapKit.h> in your header file. Now we’re ready to zoom. We will need to implement the Map View’s didUpdateUserLocation method. In order for the Map View to call this method once it finds the user’s location, we need to set its delegate property to our ViewController.
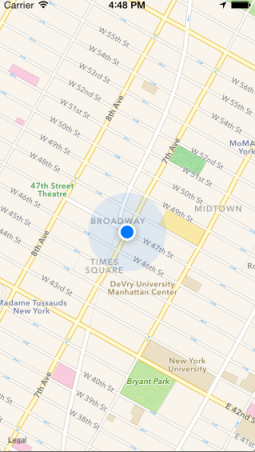
Now let’s run the application again:
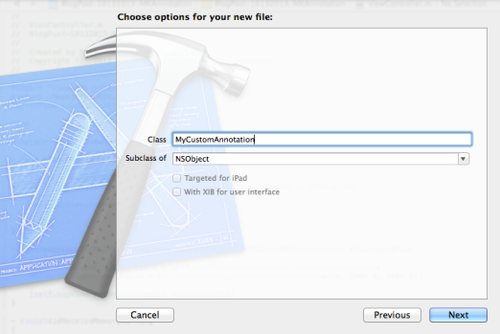
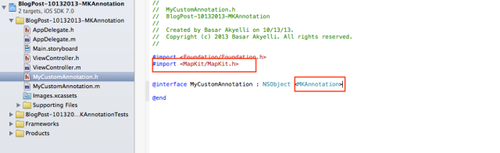
Much better. Now that we’re done with our basic set up. Let’s create a custom annotation for Bryant Park. For this, we’ll need to create a new NSObject class which adheres to the MKAnnotation delegate. Let’s go ahead and create this class, called “MyCustomAnnotation” and set its protocol:
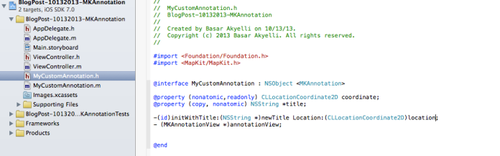
The MKAnnotation protocol asks us to create two properties: an title property which is an NSString, and a coordinate property which is a CLLocationCoordinate2D. We also need to create a new initializer as well as a method which will return an instance of MKAnnotationView:
title is the text that is displayed inside the Callout box which is shown once you tap on a pin. coordinate is the 2D coordinate of the pin. Let’s go ahead and implement our initializer and our MKAnnotationView method.
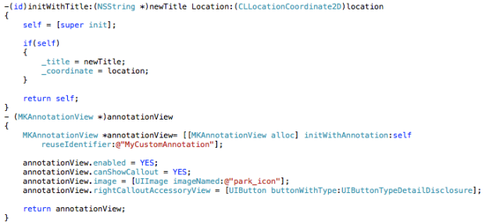
We’re basically returning a MKAnnotationView object that has a custom image (park_icon) and it is able to show a Callout dialogue. It will also have an Detail Disclosure accessory on its right side.
Let’s go ahead and add our custom MKAnnotationView to our map. Let’s not forget to import **MyCustomAnnotation.h to our ViewController.m file. We will need to add an annotation to our map, and we’ll also need to implement the viewForAnnotation method of the MapView **protocol to set our annotation’s view to our newly built method.
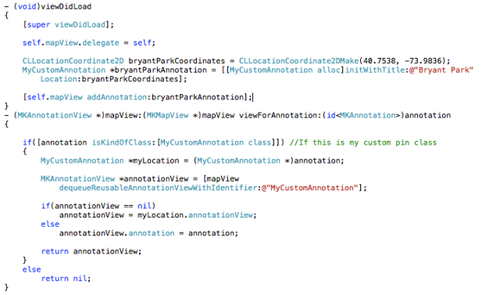
We’re asking the mapView if there are any unused MyCustomAnimation annotations that we can re-use (this is to prevent creating unnecessary annotations — we only need what we see on our screen.) Then we set it to our annotationView method which we built into our MyCustomAnnotation object.
We’re done! Let’s see what our app looks like now:
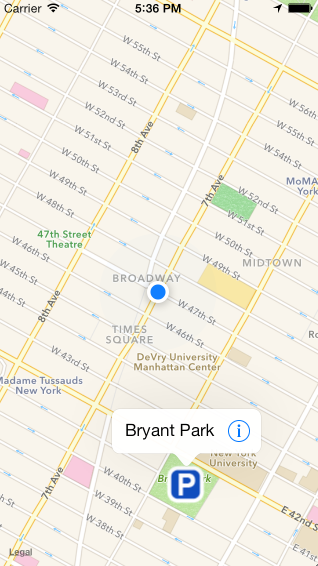
That’s it! Not that bad, is it?