How to Set Up Your Professional Data Science Environment

Data Science is often described as the intersection of statistics and programming. In this article, I’ll run you through setting up a professional data science environment on your computer so you can start to get some hands-on practice with popular data science libraries — whether you just want to get a feel for what it’s […]
Data Science is often described as the intersection of statistics and programming. In this article, I’ll run you through setting up a professional data science environment on your computer so you can start to get some hands-on practice with popular data science libraries — whether you just want to get a feel for what it’s like or whether you’re considering upgrading your career!
What is a professional data science environment?
Well, it depends on which professional data scientist you talk to! But, a general consensus is starting to emerge in the data science community:
- Programming Language: Python 3.x – There are many practicing data scientists who continue to use R – especially if they have a strong background in statistics. But in general, Python is a more versatile and popular programming language that makes it easier to solve a wider range of problems from web scraping and data clean up to modeling and building out dashboards or productionizing your models. Today, most data scientists are using Python 3.
- Editor: Jupyter Notebook – There are lots of great text editors for editing Python code – PyCharm is particularly good if you’re willing to pay, and Visual Studio Code is a popular, free option. But for creating shareable files that make it easy for you to interleave comments, code and charts, it’s really hard to beat Jupyter Notebook.
Many professional data scientists also use git – a version control system – to keep track of the changes that they make to their work, and to collaborate more seamlessly with others. But to keep the length of this article under control, we’ll save the joys of installing, configuring, and using git for another day!
The easiest way to install Python and Jupyter Notebook is via the free Anaconda distribution. It also includes a lot of the packages that you’ll need for data science like pandas, statsmodels and scikit-Learn.
The installation process depends on whether you’re using Windows or a Mac (I’m going to assume that if you’re using Linux, you can figure out how to install Anaconda – here’s a starting point if you’re running Ubuntu).
Windows
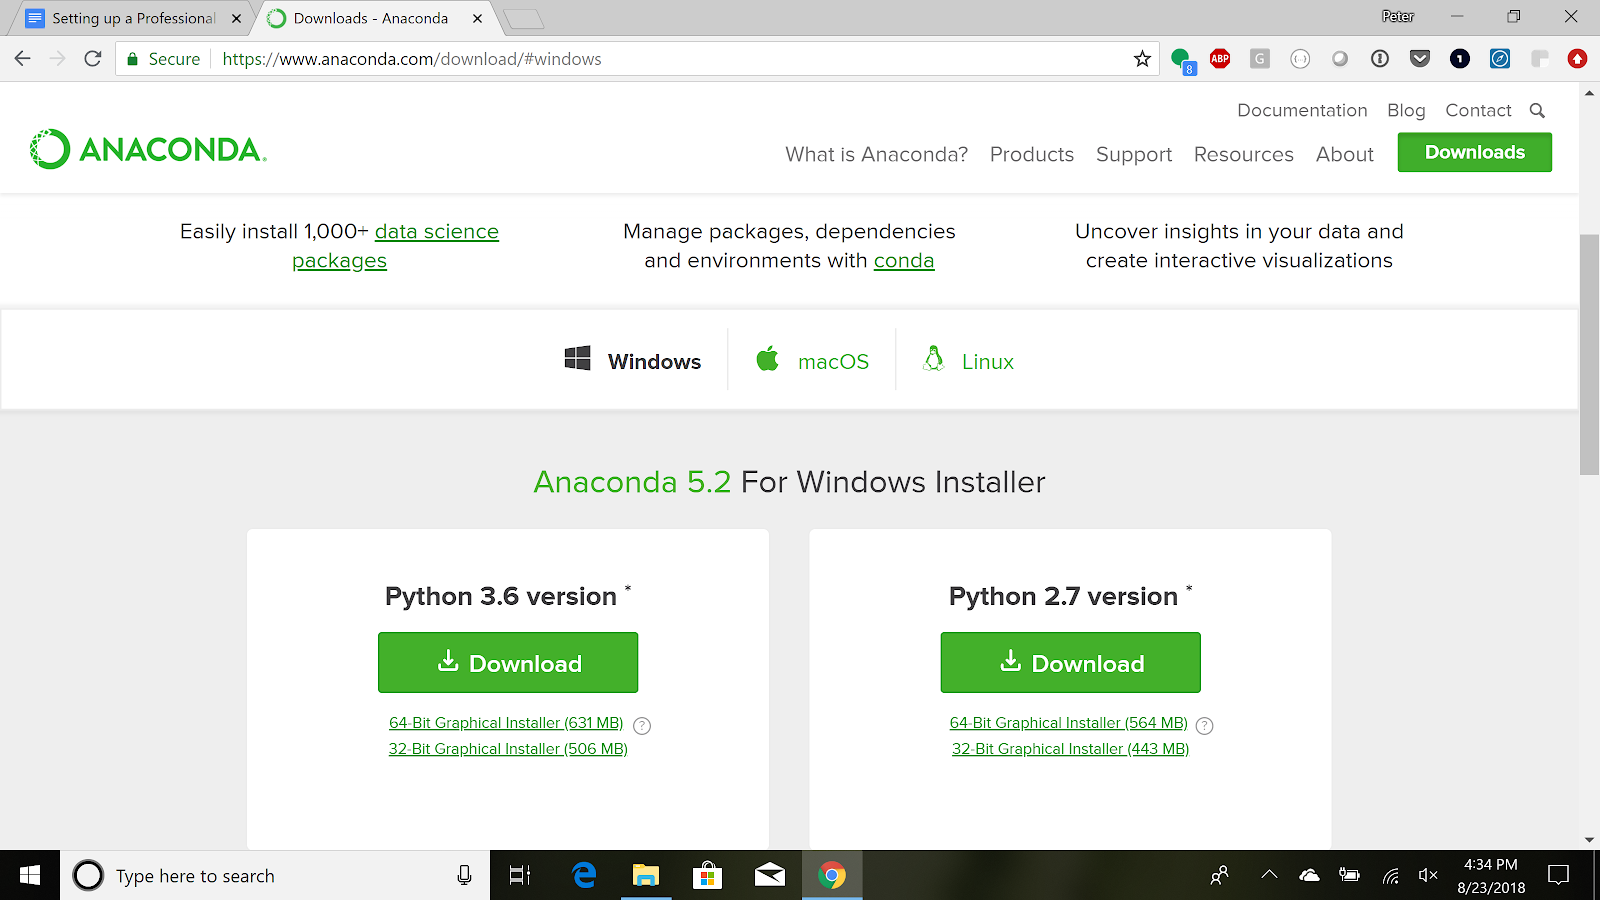
Go here and click on the “Download” button for the Python 3.x (currently 3.7) version of Anaconda.
A window may pop up asking if you want to give Anaconda your information in return for a cheat sheet – you don’t need to do so unless you want to.
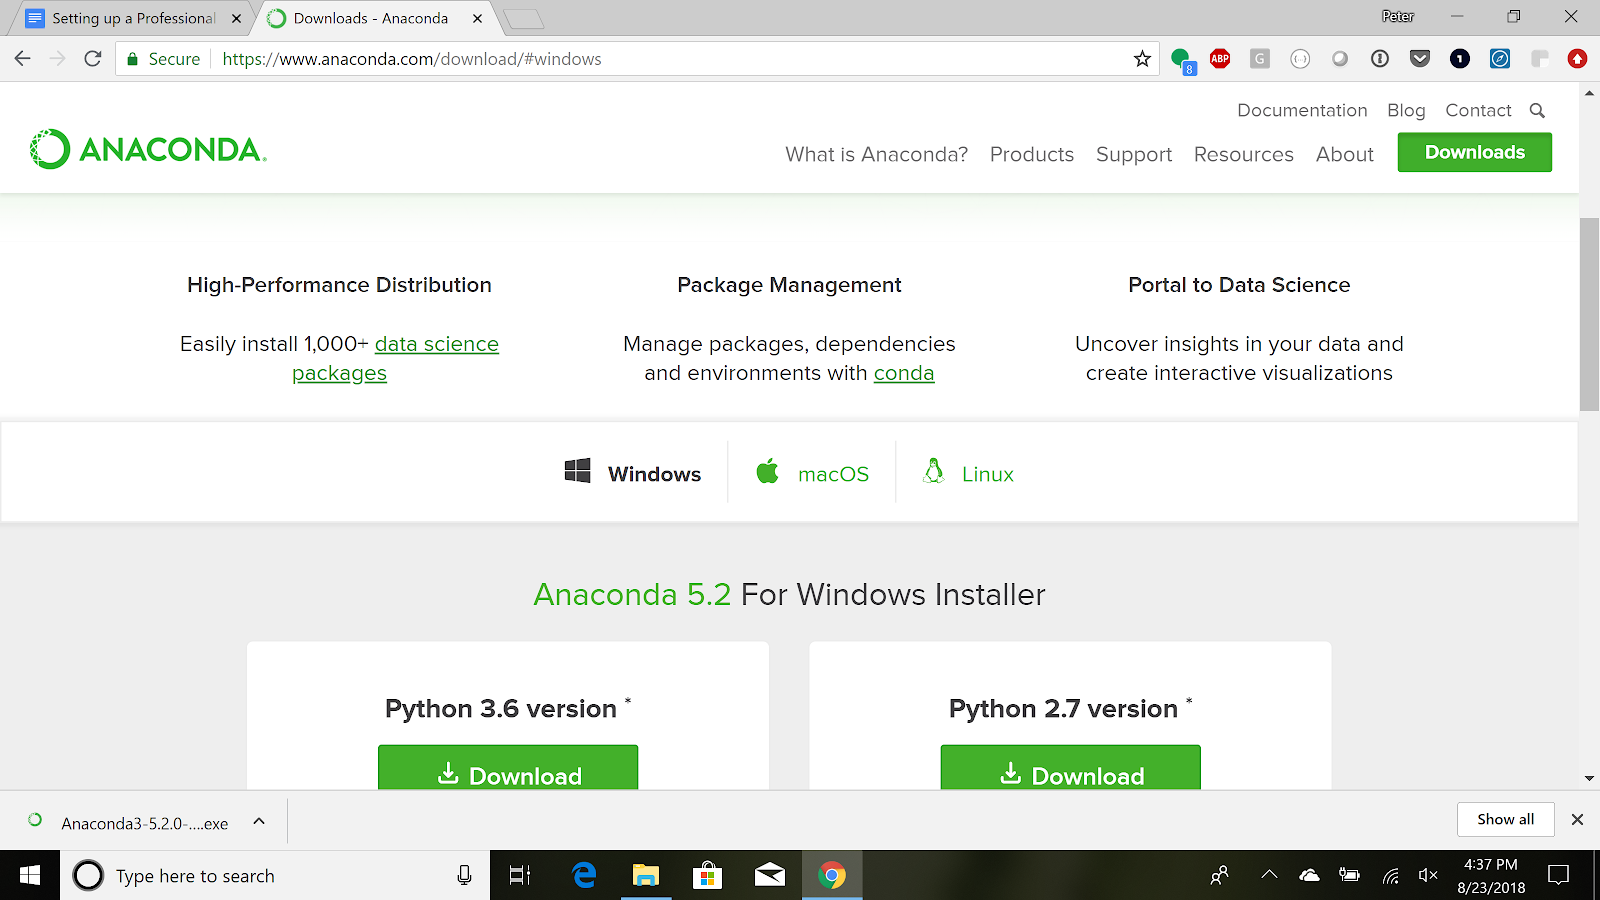
You should see in the bottom of your browser window that a .exe file is being downloaded. When it finishes downloading, click on the arrow to the right of the name of the file in the bottom left corner of your browser, and select “open.”
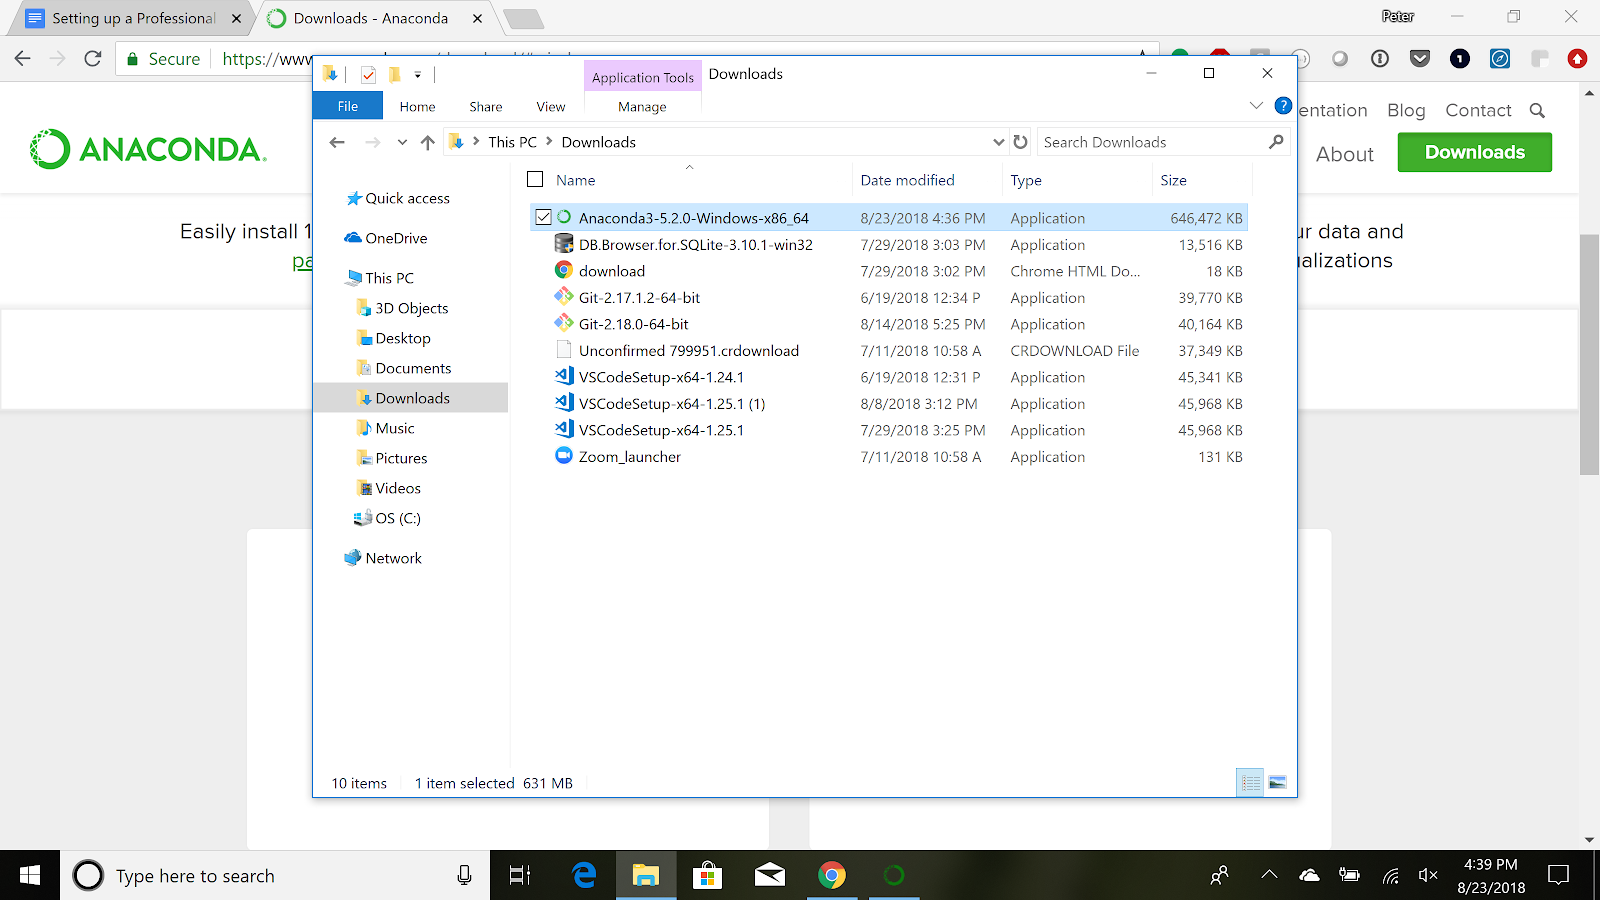
If you don’t see the file in your browser, you can also just open up Windows Explorer, navigate to the “Downloads” directory and double click on the Anaconda file in the list to open it.
That will open the Anaconda installer which will install the software for you on your computer.
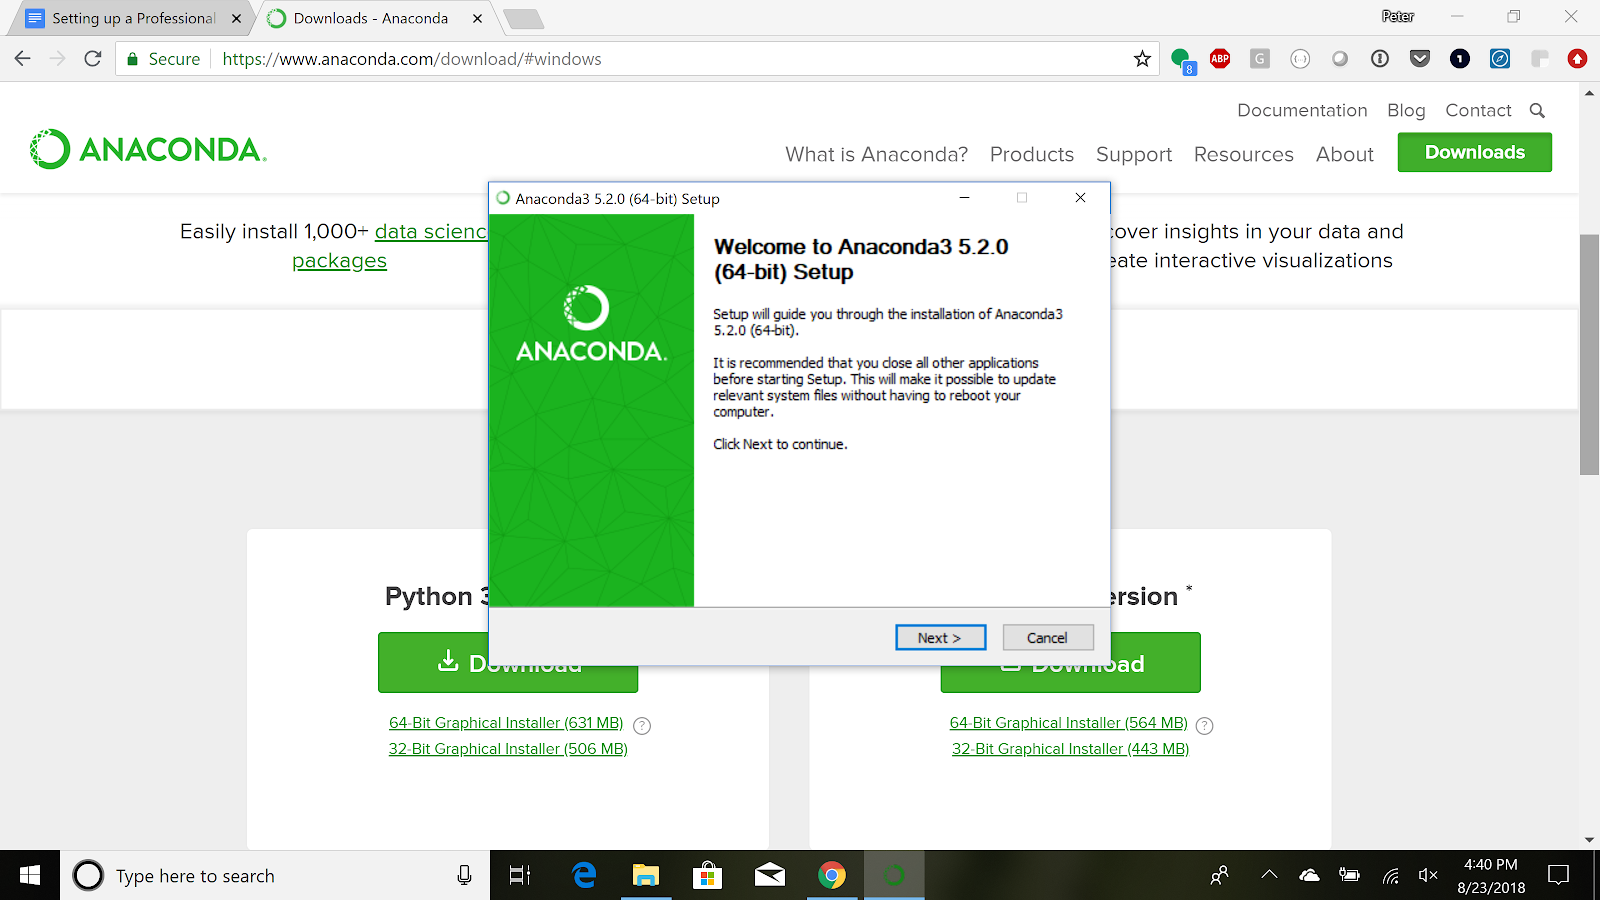
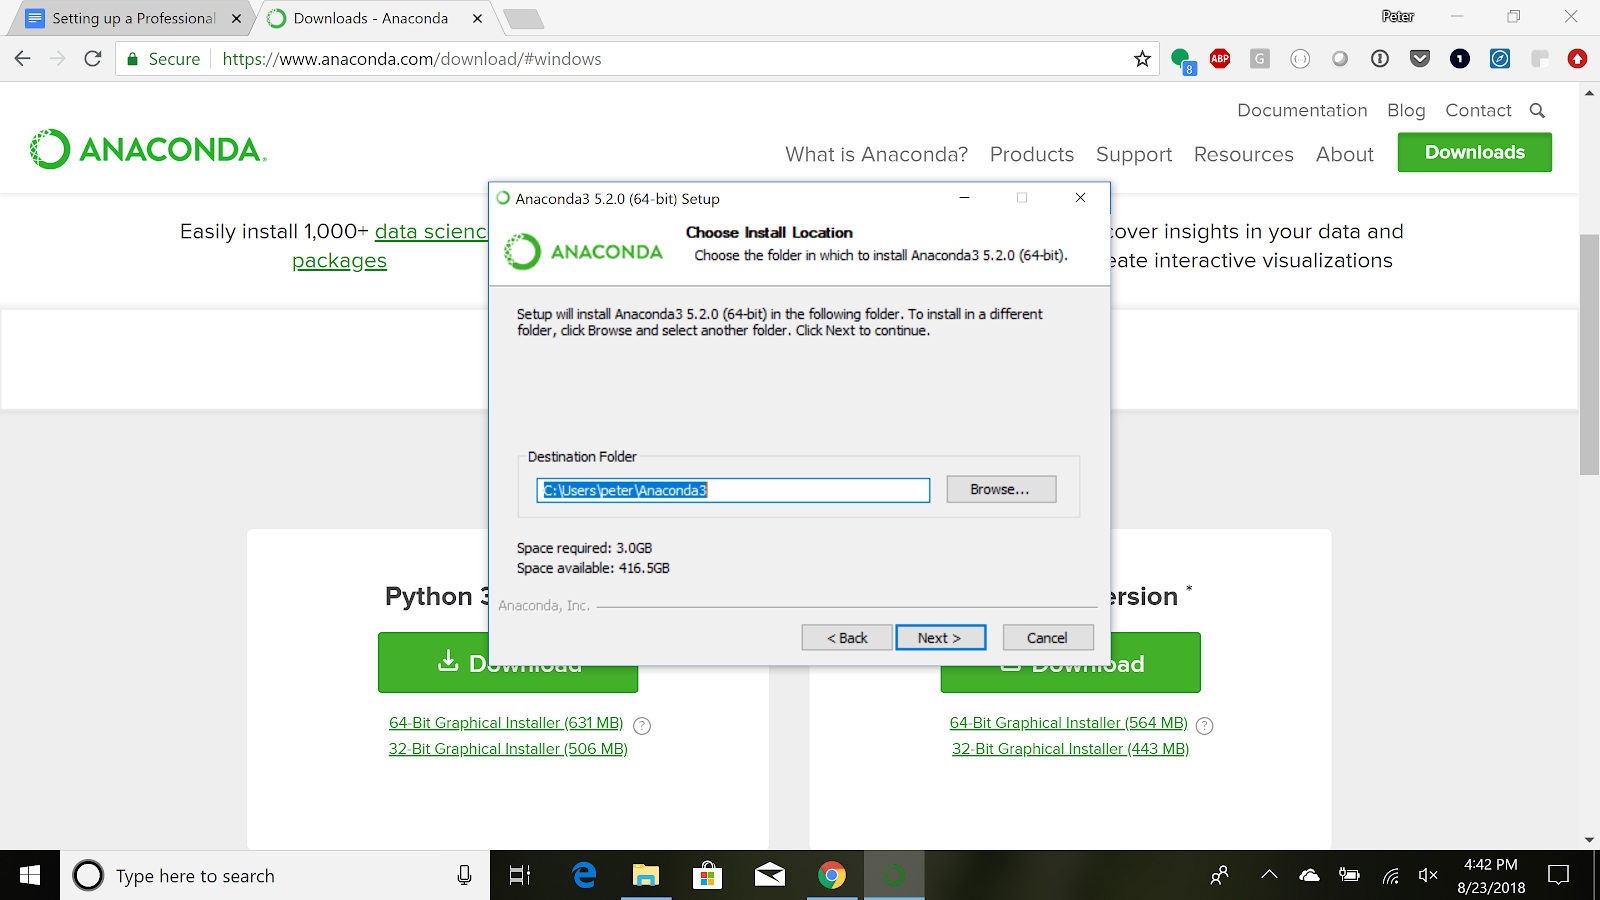
Click “Next”, then “I agree” to accept the license, and you can install for “Just me,” clicking next. Then select the destination folder (the default should work for most people).
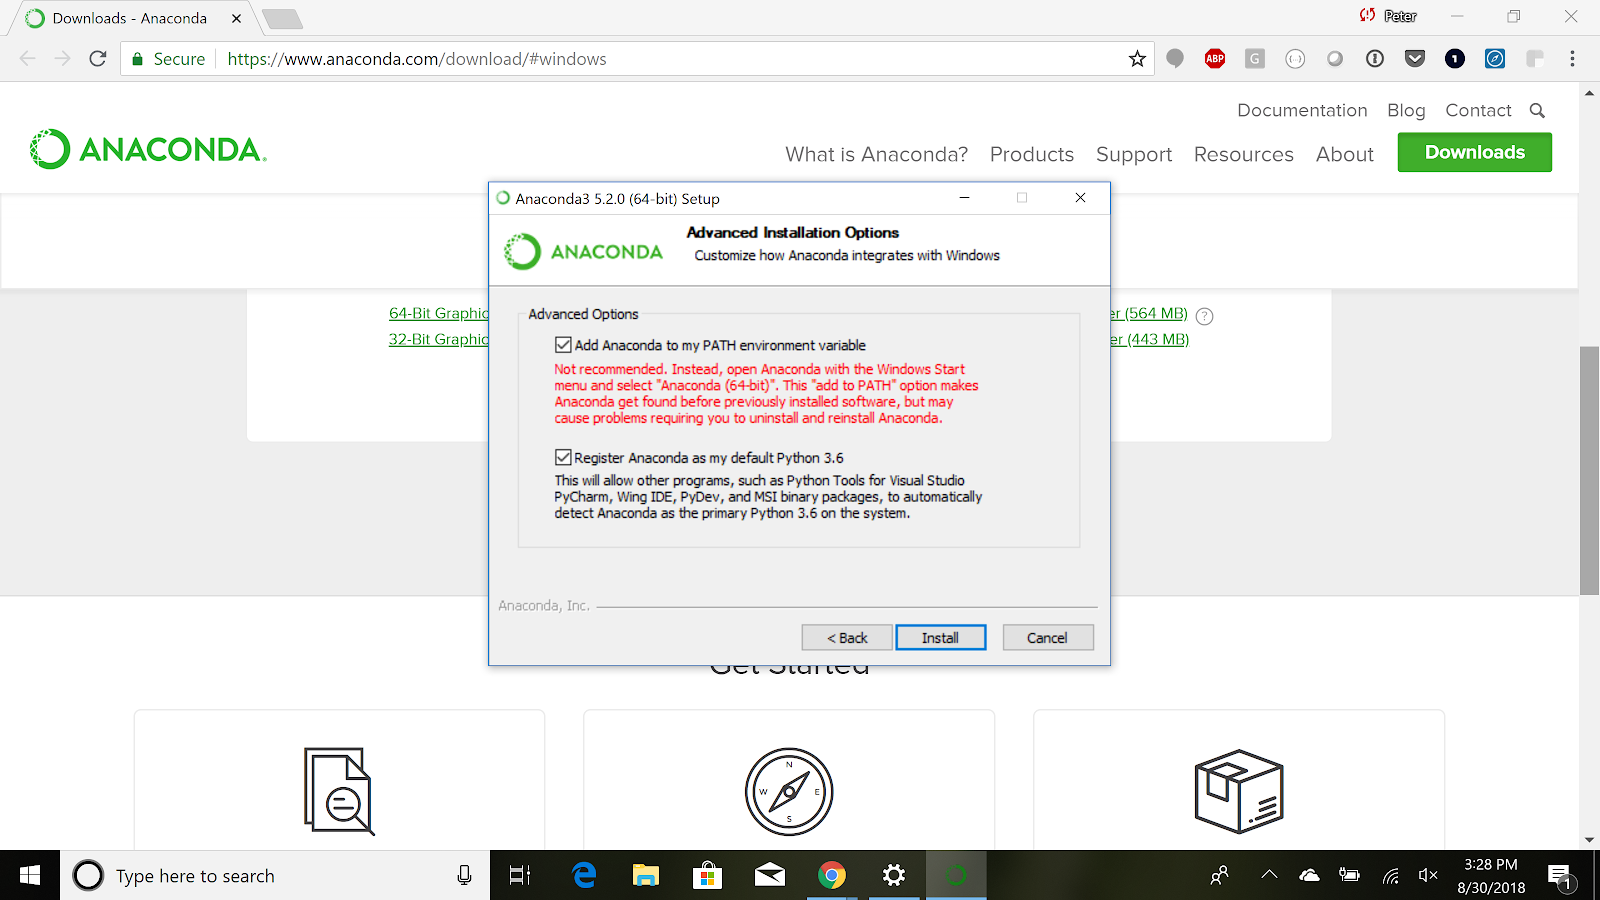
On the next screen, make sure to check the “Add Anaconda to my PATH environment” check box. It will inform you that it’s not recommended, but this is required to be able to access Anaconda from the command line and it’ll give you the most flexibility when working on projects. Then click “Install.”
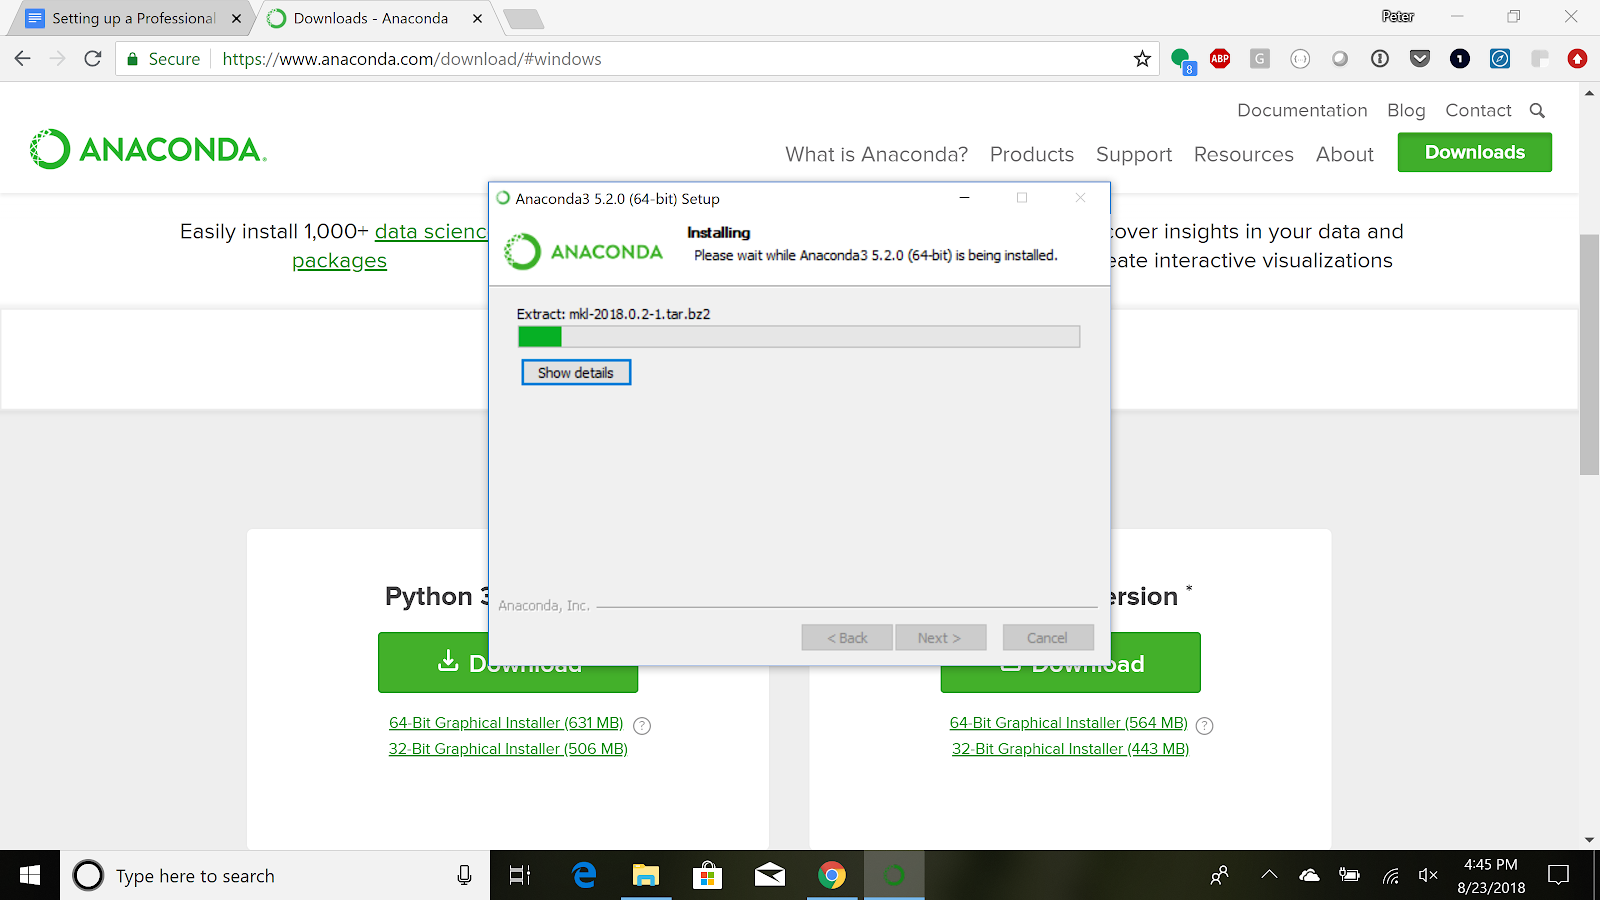
This step may take a few minutes.
Once the installation is complete:
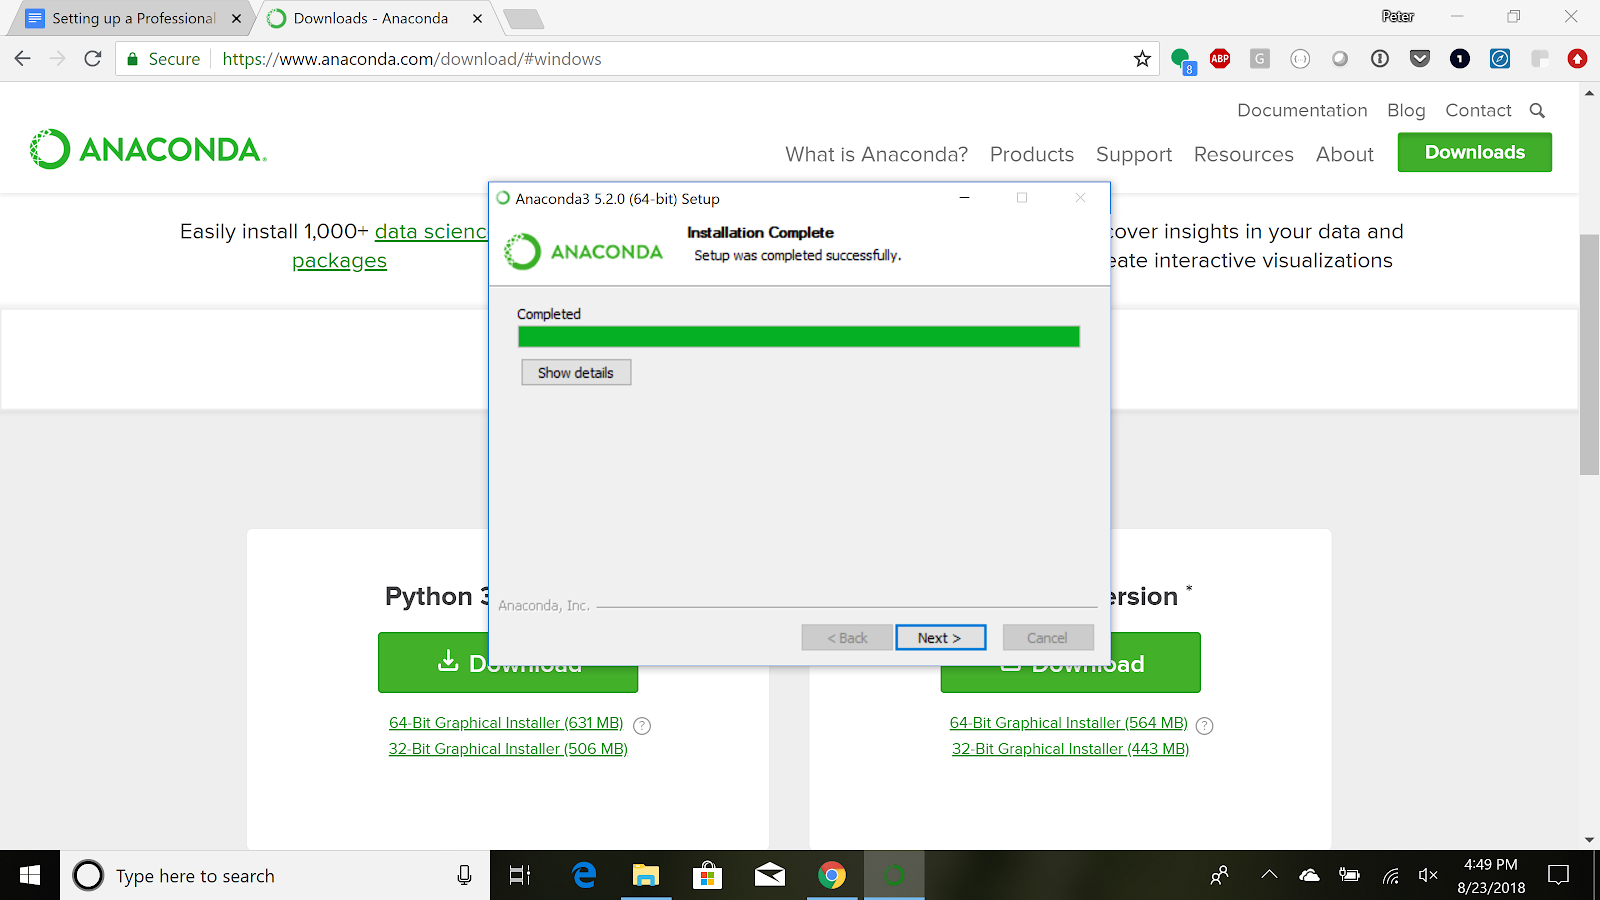
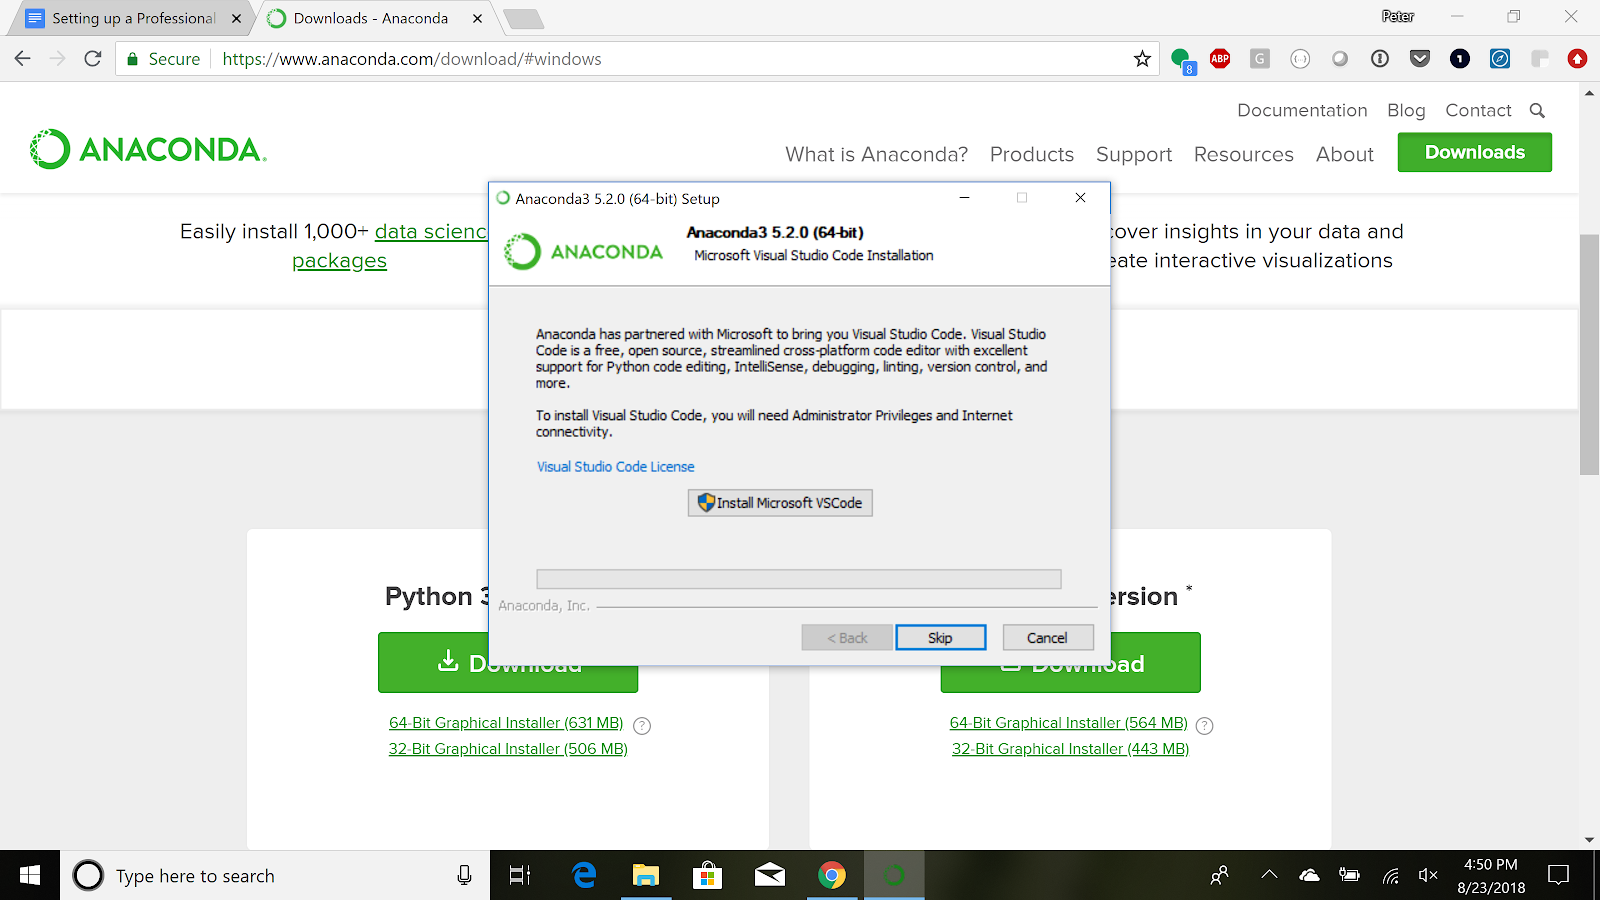
Hit “Next.” You can skip the Microsoft Visual Code Studio or PyCharm installation.
And then finally click “Finish.”
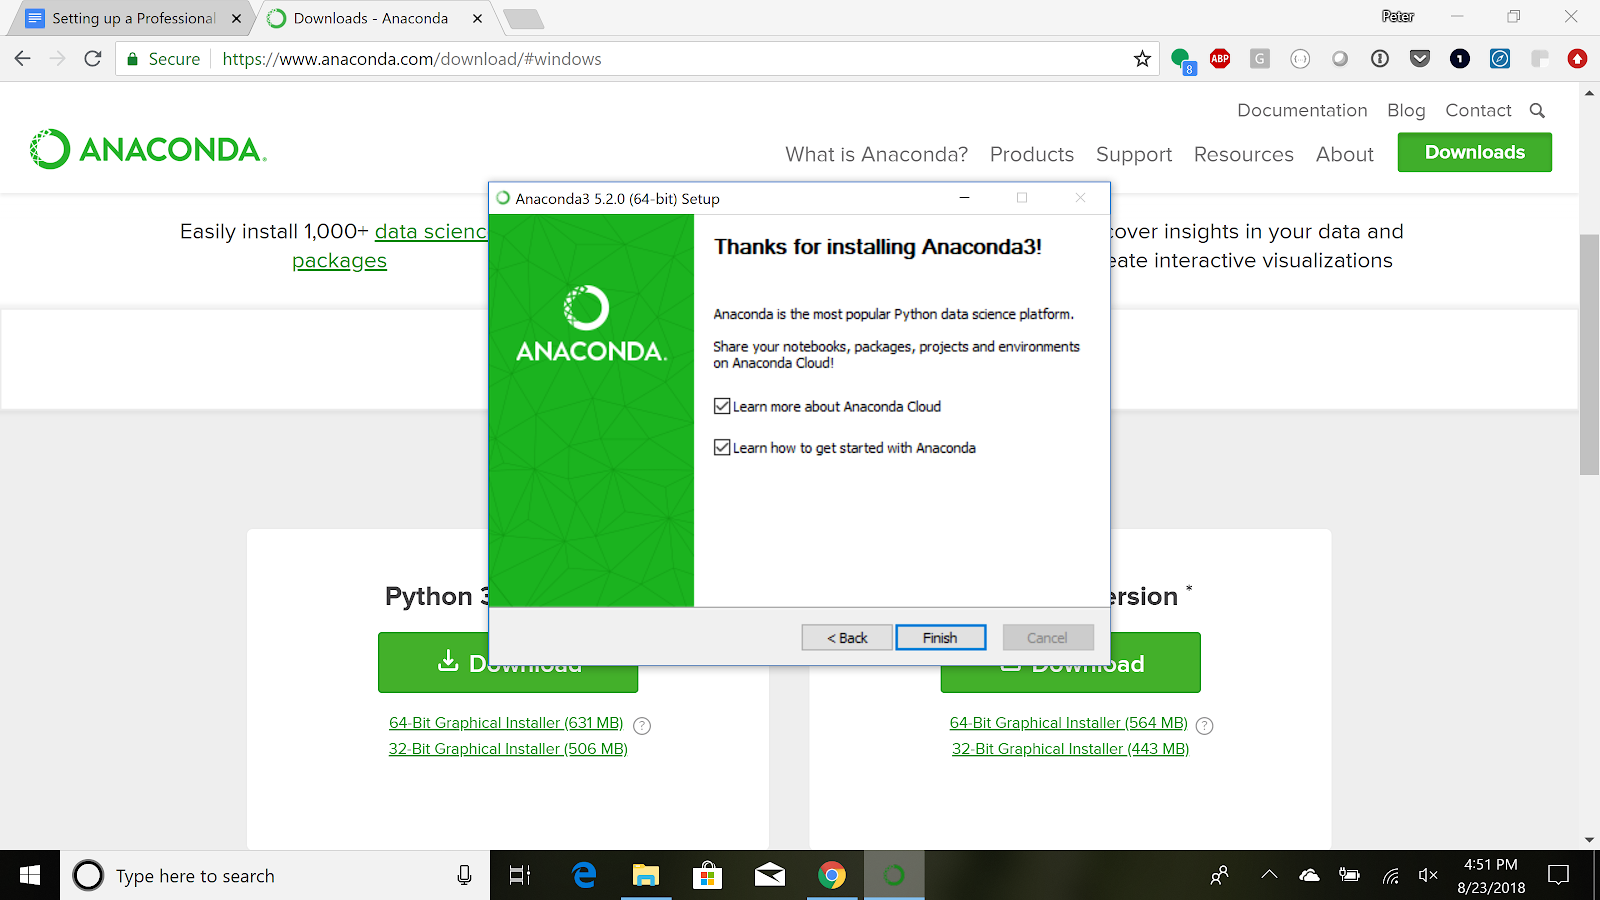
It’ll open up a browser window which you can just close down.
And that’s the process of installing Anaconda! The next step is to test your installation.
Mac
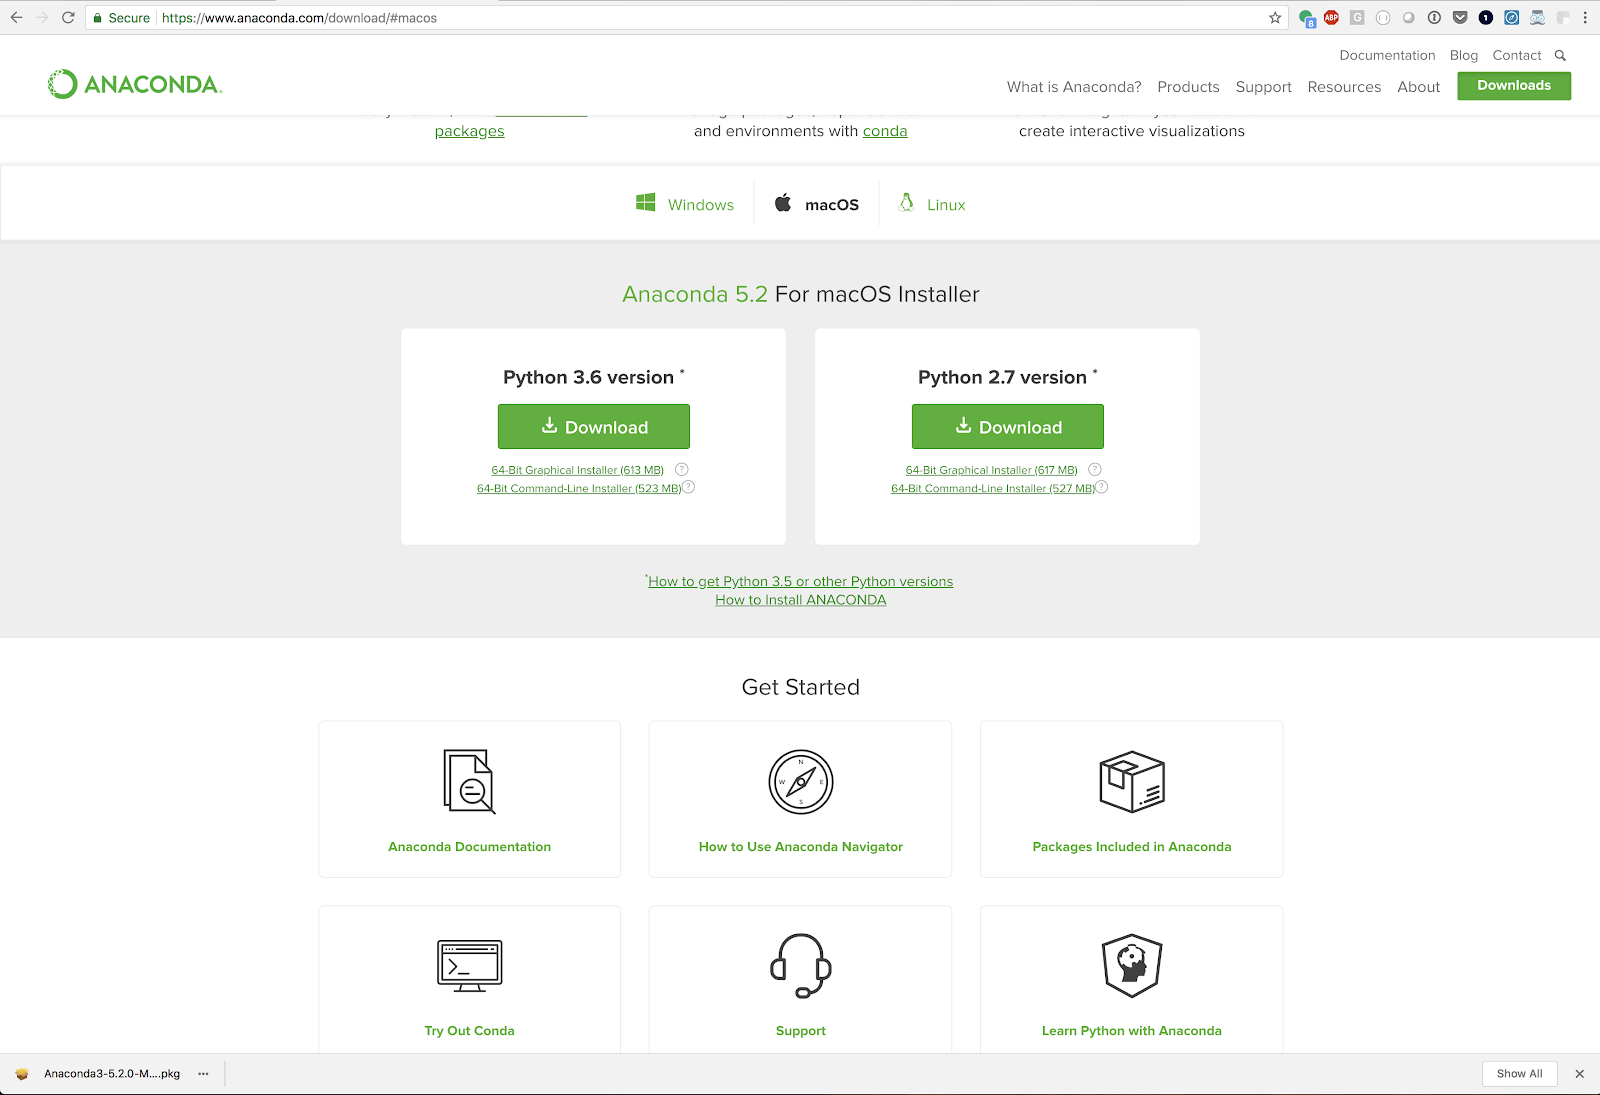
Go here and click on the “Download” button for the Python 3.x (currently 3.7) version of Anaconda.

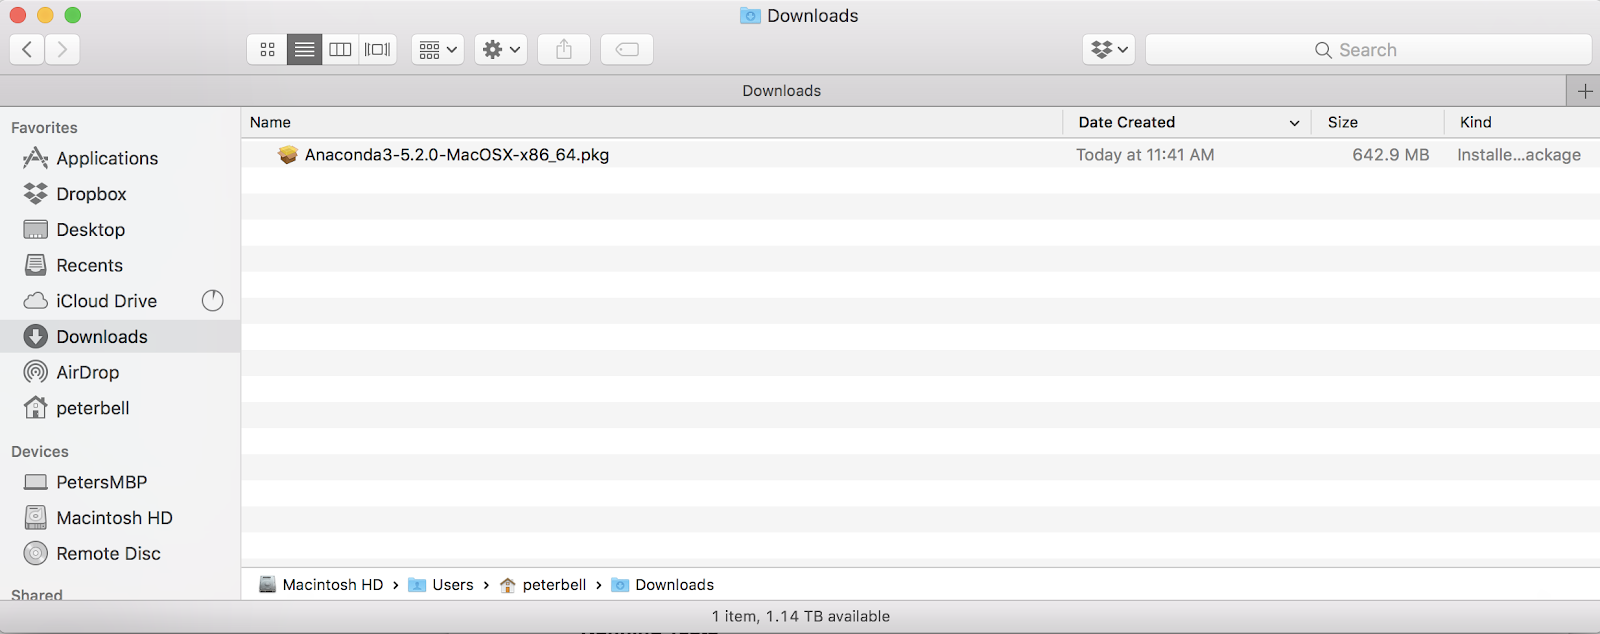
You should see in the bottom of your browser window that a .pkg file is being downloaded. When it finishes downloading, click on the arrow to the right of the name of the file in the bottom left corner of your browser, and select “Open.”
If you don’t see the file in your browser, you can also just open up the finder, navigate to the “Downloads” directory and double click on the Anaconda file in the list to open it.
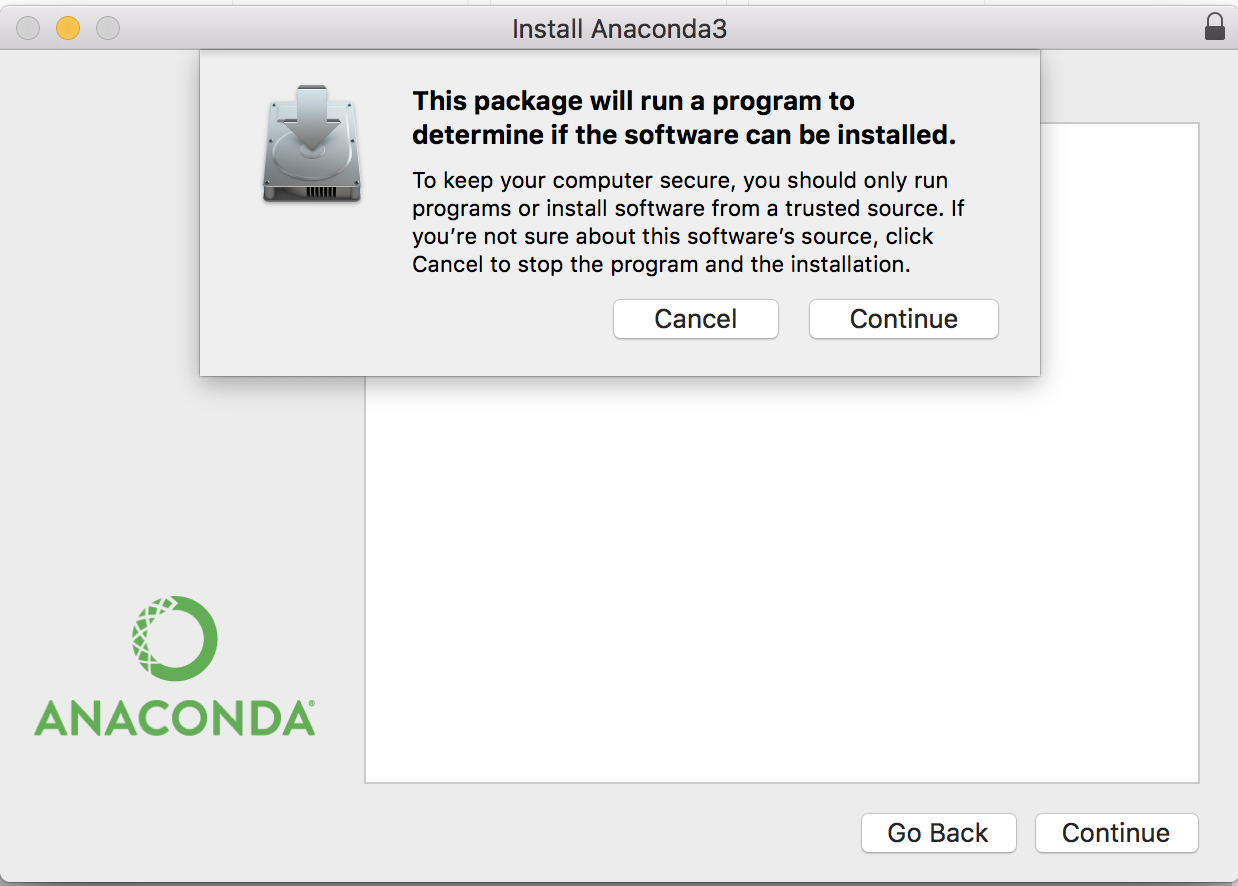
You’ll be informed that the package will run a program to see whether the software can be installed. Click “Continue.”
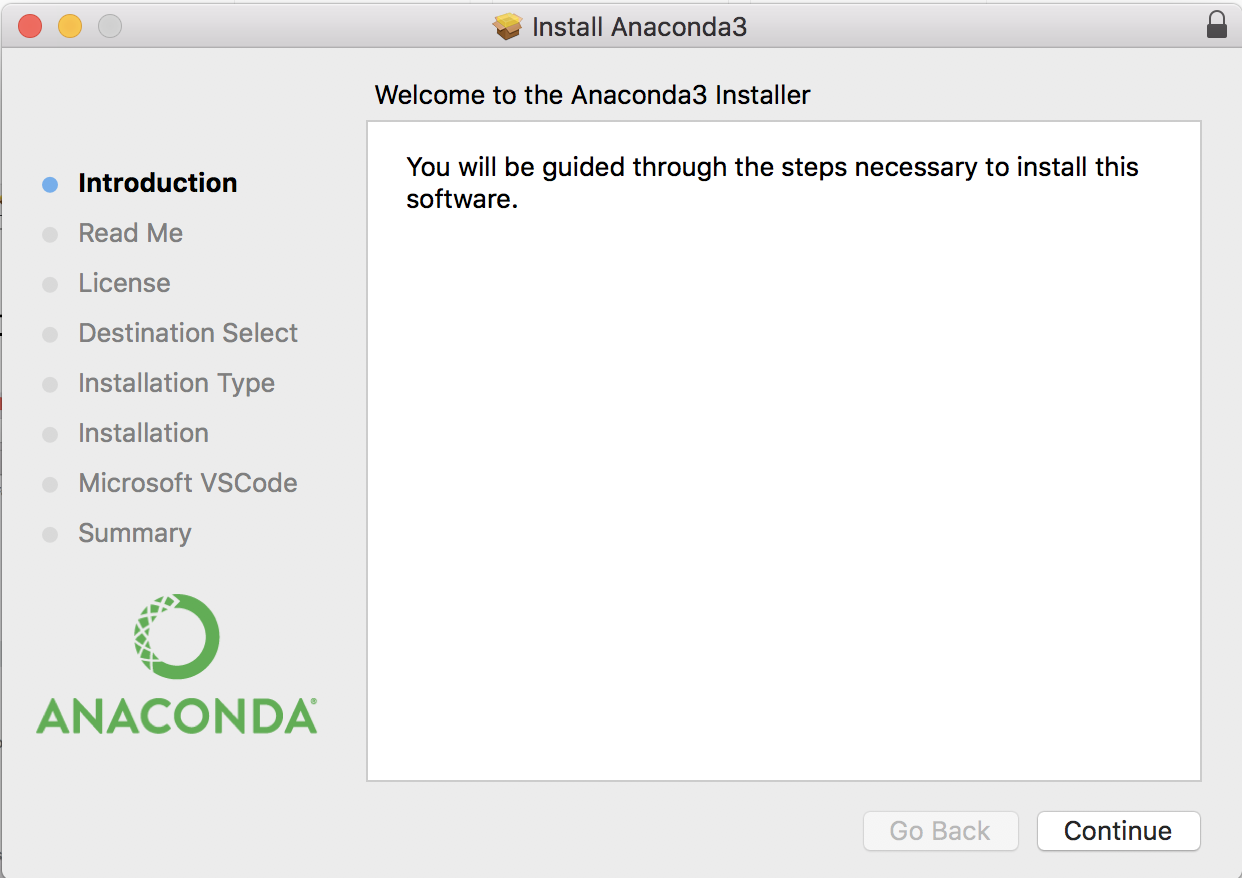
You’ll then see a wizard that will run you through the installation process. Click continue on the first screen.
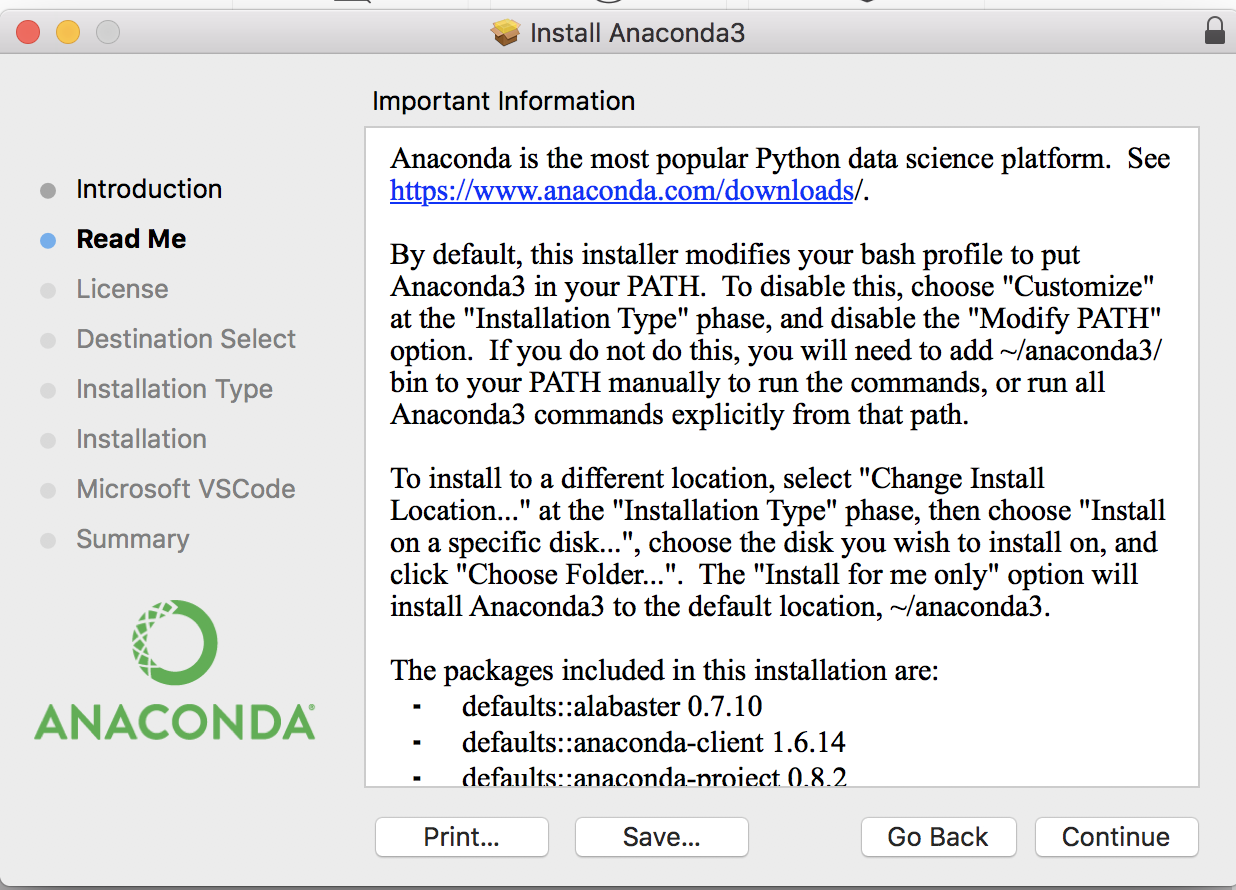
Then look at the read me, and click “Continue” again.
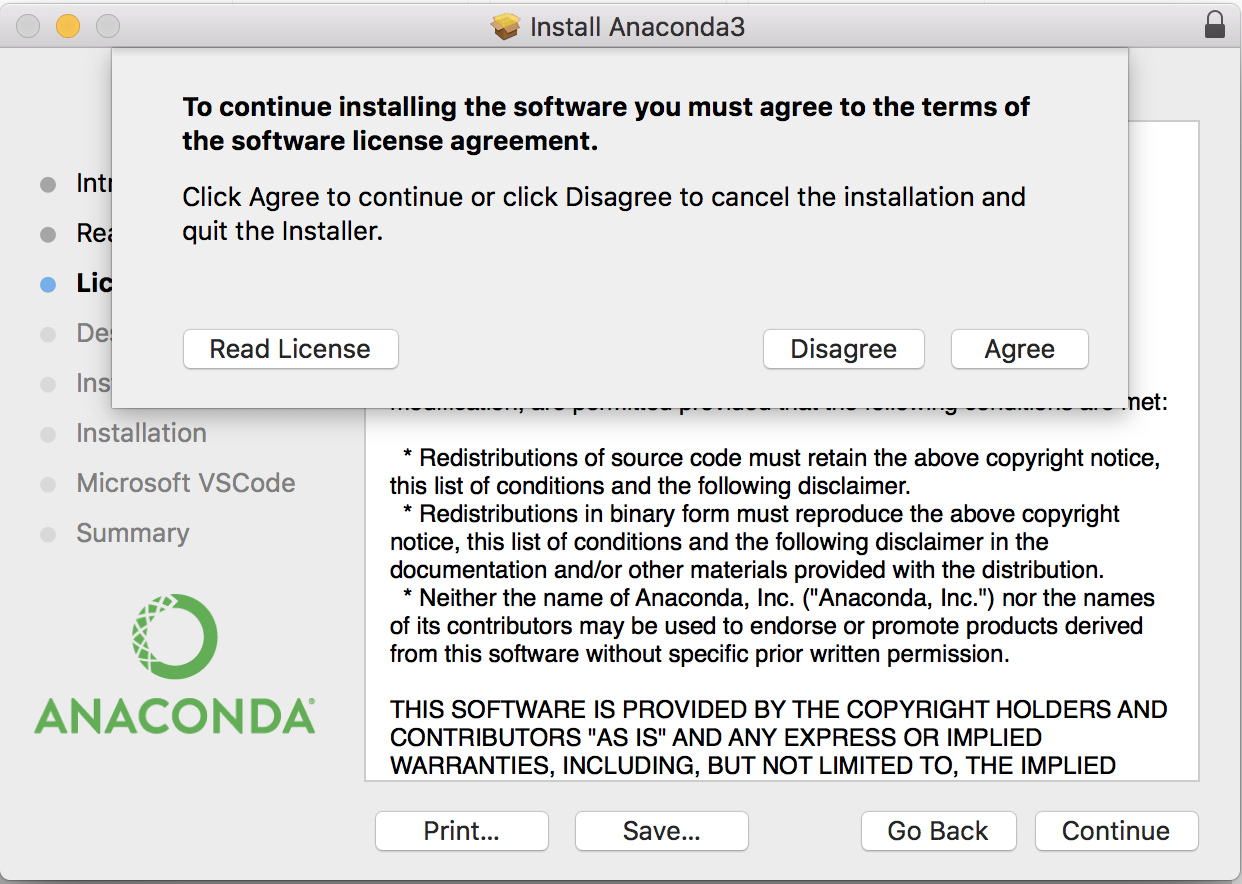
You’ll then need to accept the license. Start by clicking “Continue.”
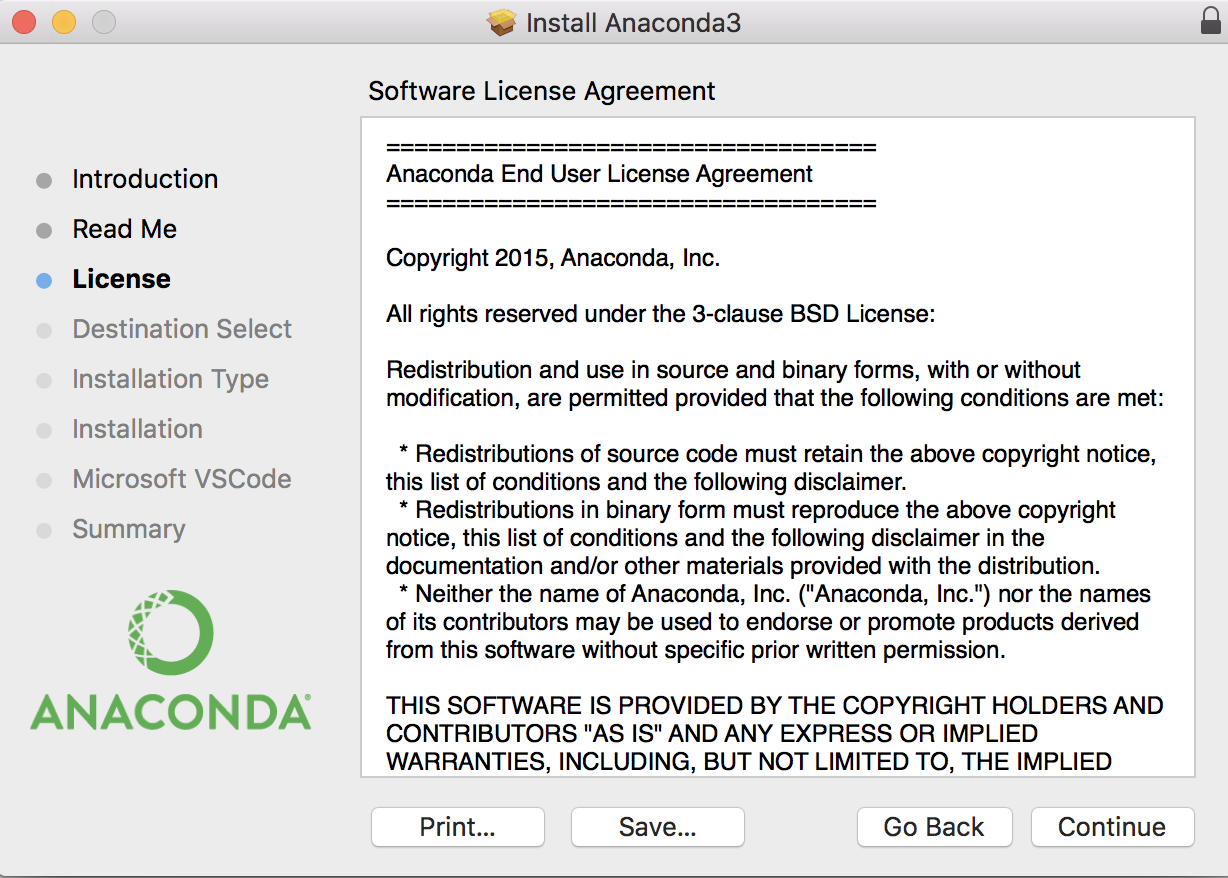
And then click on “agree” in the dialog that comes up and asks you to accept the license.
Then click on “Install” to install the software.
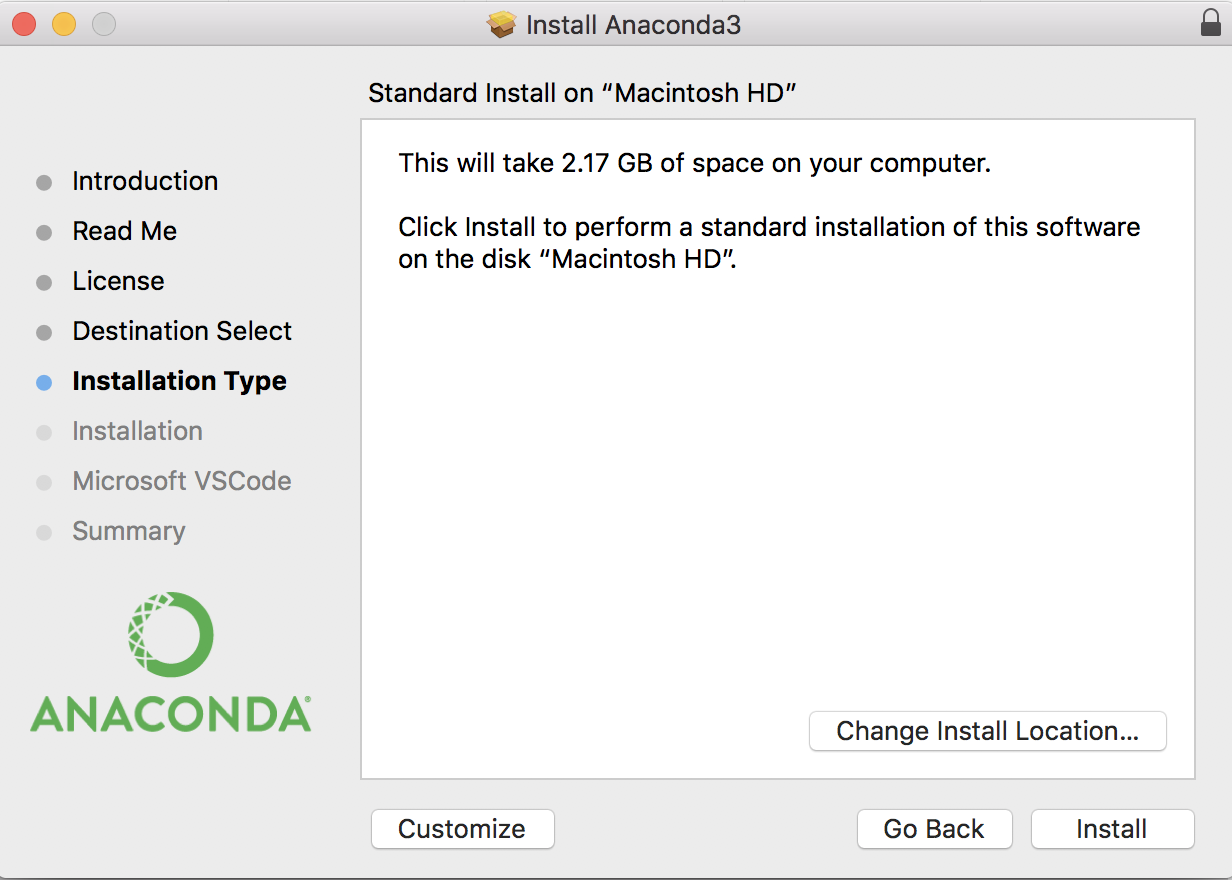
And you’ll have to enter an administrative username and password for your computer to finally install the software.

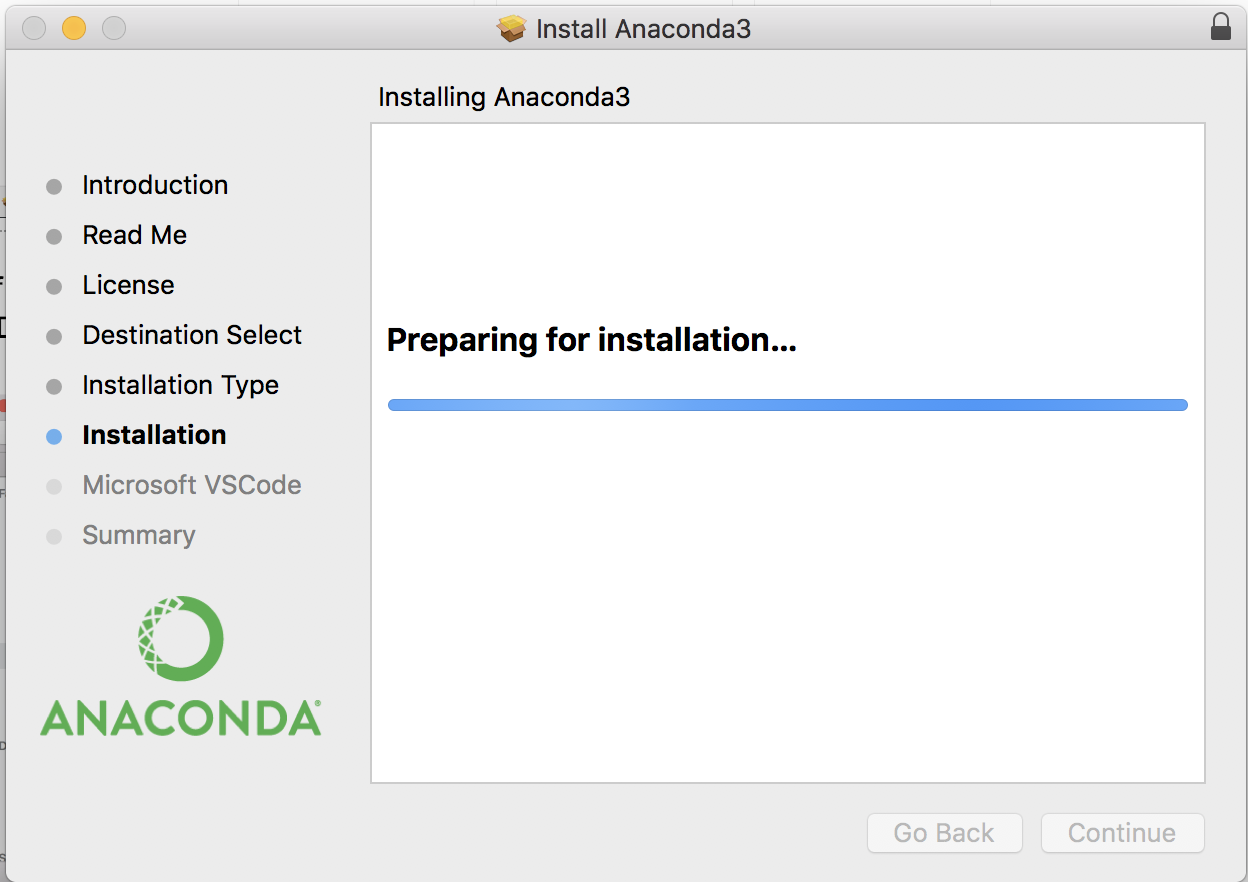
The wizard will let you know next that it’s preparing the install, and then it’ll take a couple of minutes to install the necessary software.
You’ll be given the option to install Microsoft Visual Studio Code or PyCharm. For now, you can skip that option by clicking “Continue.”

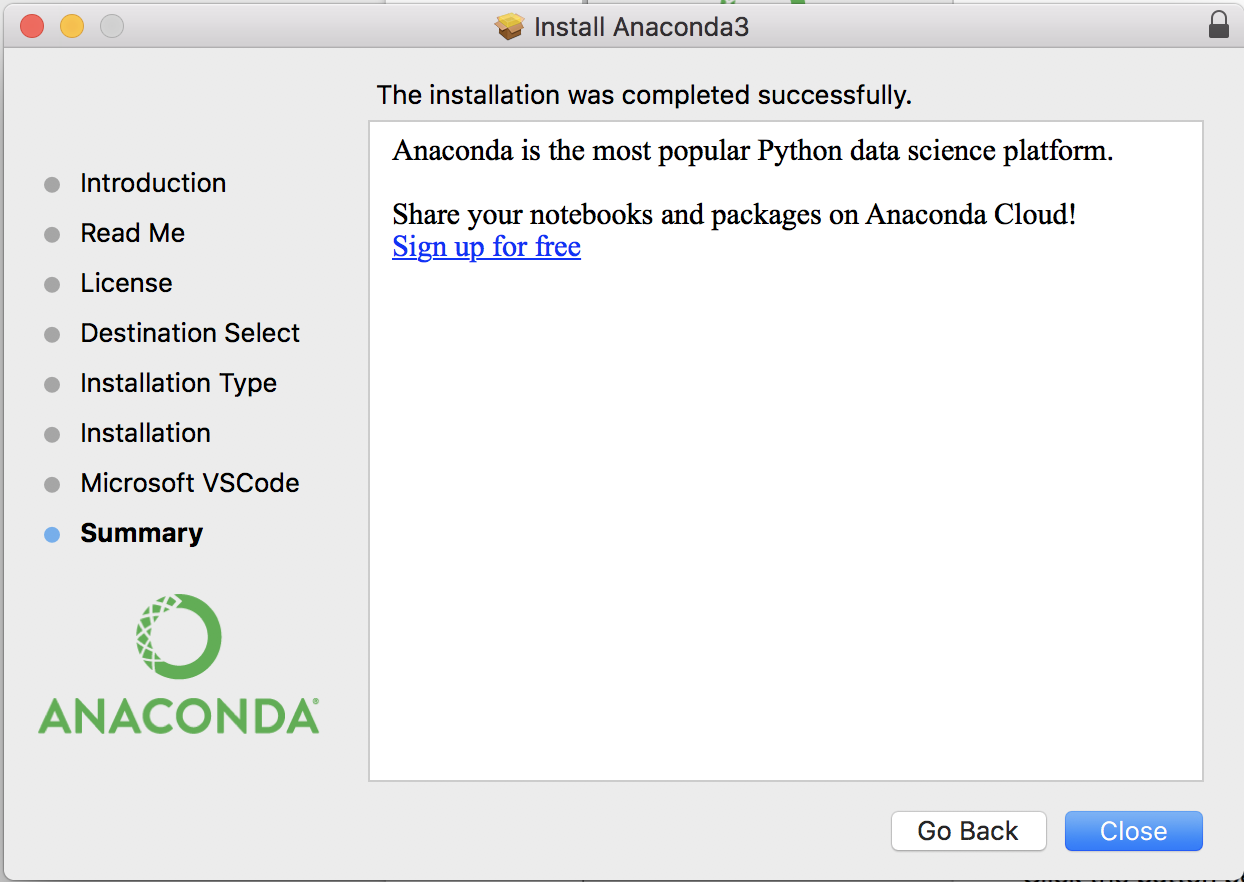
You should then see a final window informing you that the software was installed successfully. Click close to finish the installation.
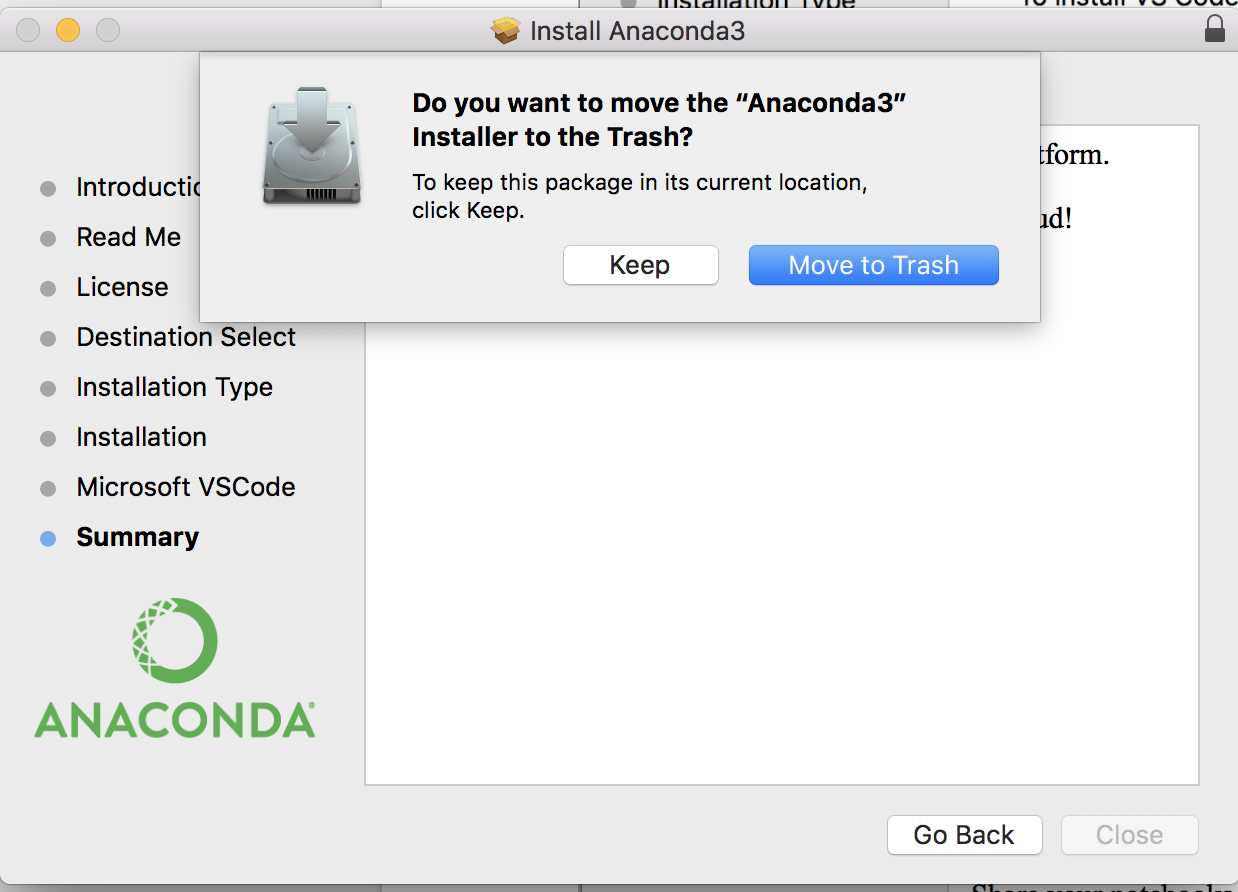
If you’re asked whether you’d like to move the installer to trash, click the “Move to trash” button.
Testing your installation
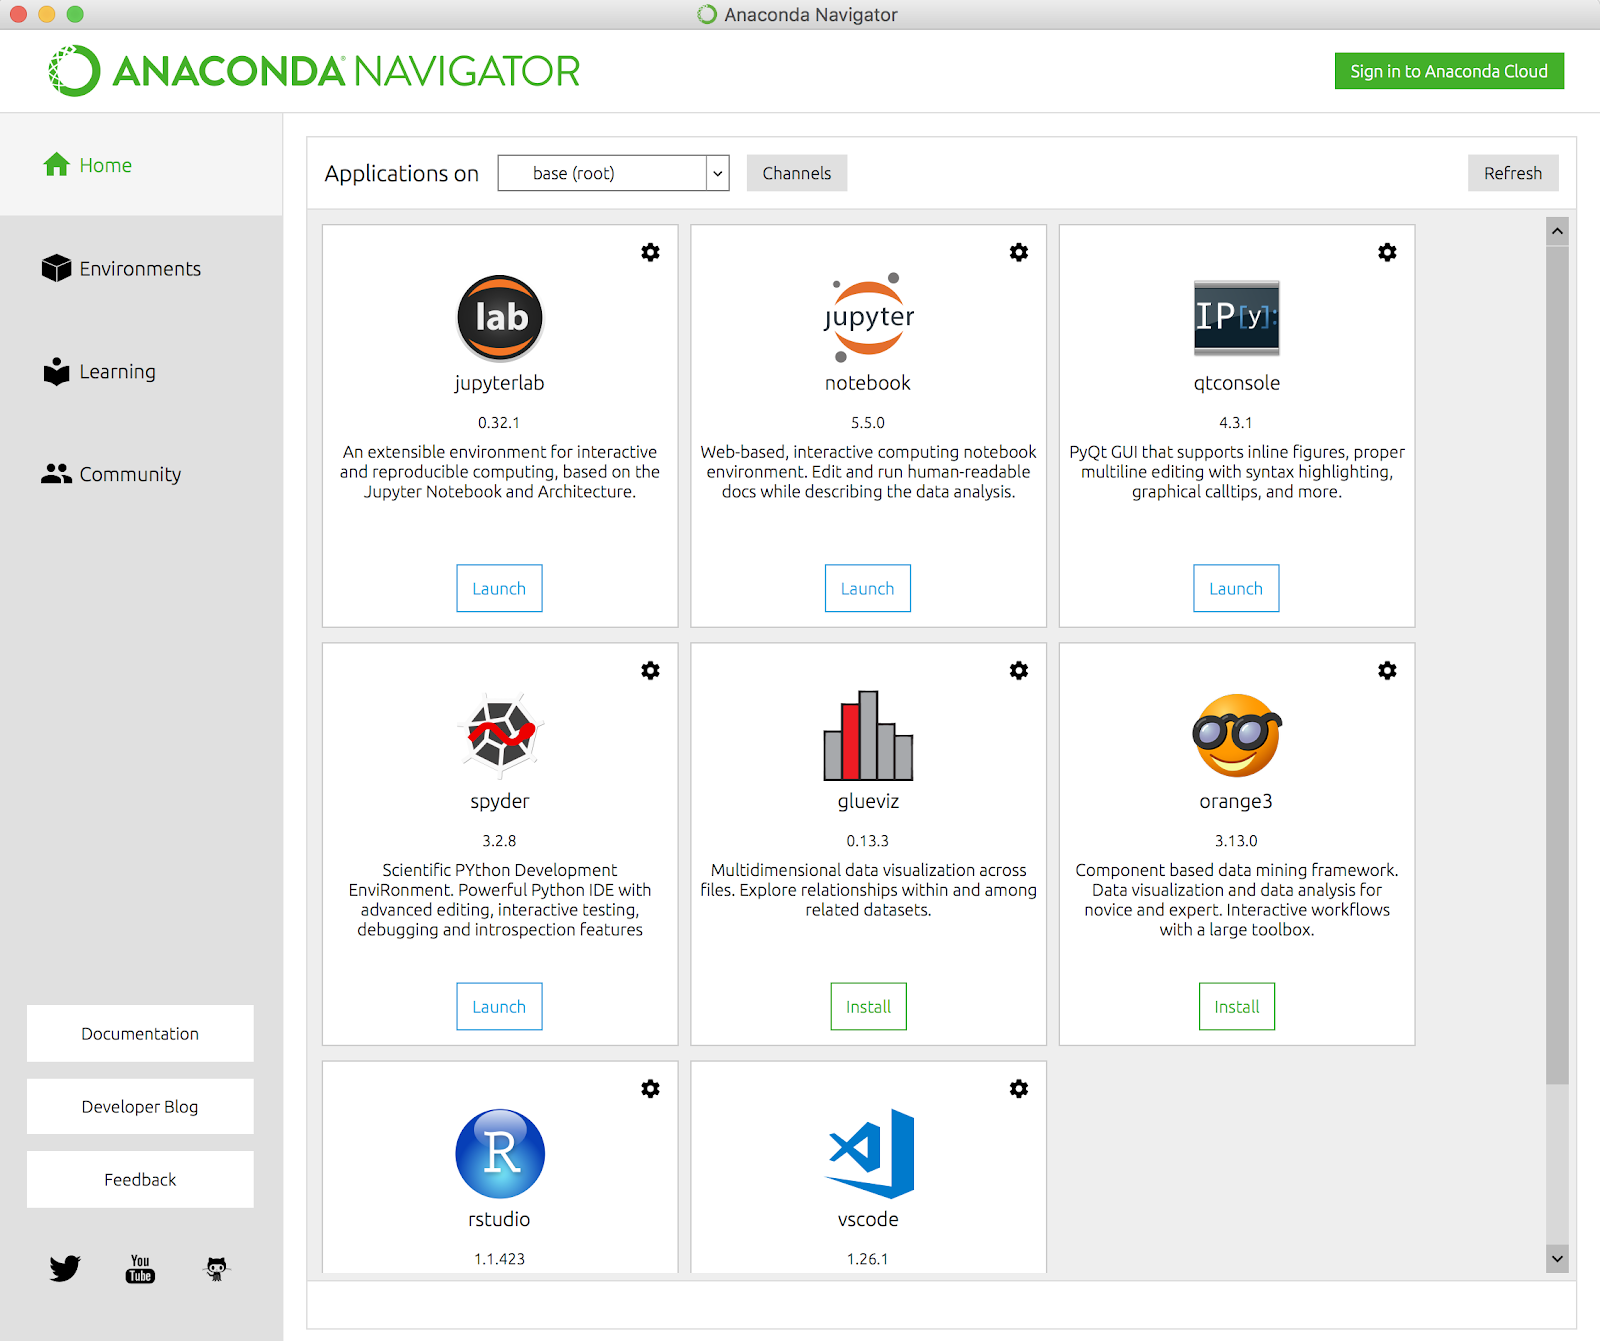
To test your installation, on Windows, click on Start and then Anaconda Navigator in the program list (or search for Anaconda in the search bar and select Anaconda Navigator). On a Mac, open the Finder, and in the Applications folder, double-click on Anaconda-Navigator.
From now on, screenshots will be from a Mac, but we’ll highlight any material differences in the experience between the OS’s.
The Anaconda Navigator is one of the ways you’ll be able to run Jupyter Notebooks. Click on the “launch” button in the Jupyter notebook tile.
On a Mac, you’ll see a terminal window pop up.

On both Windows and a Mac you’ll see a window in your web browser that allows you to open existing Jupyter notebooks or create a new one.
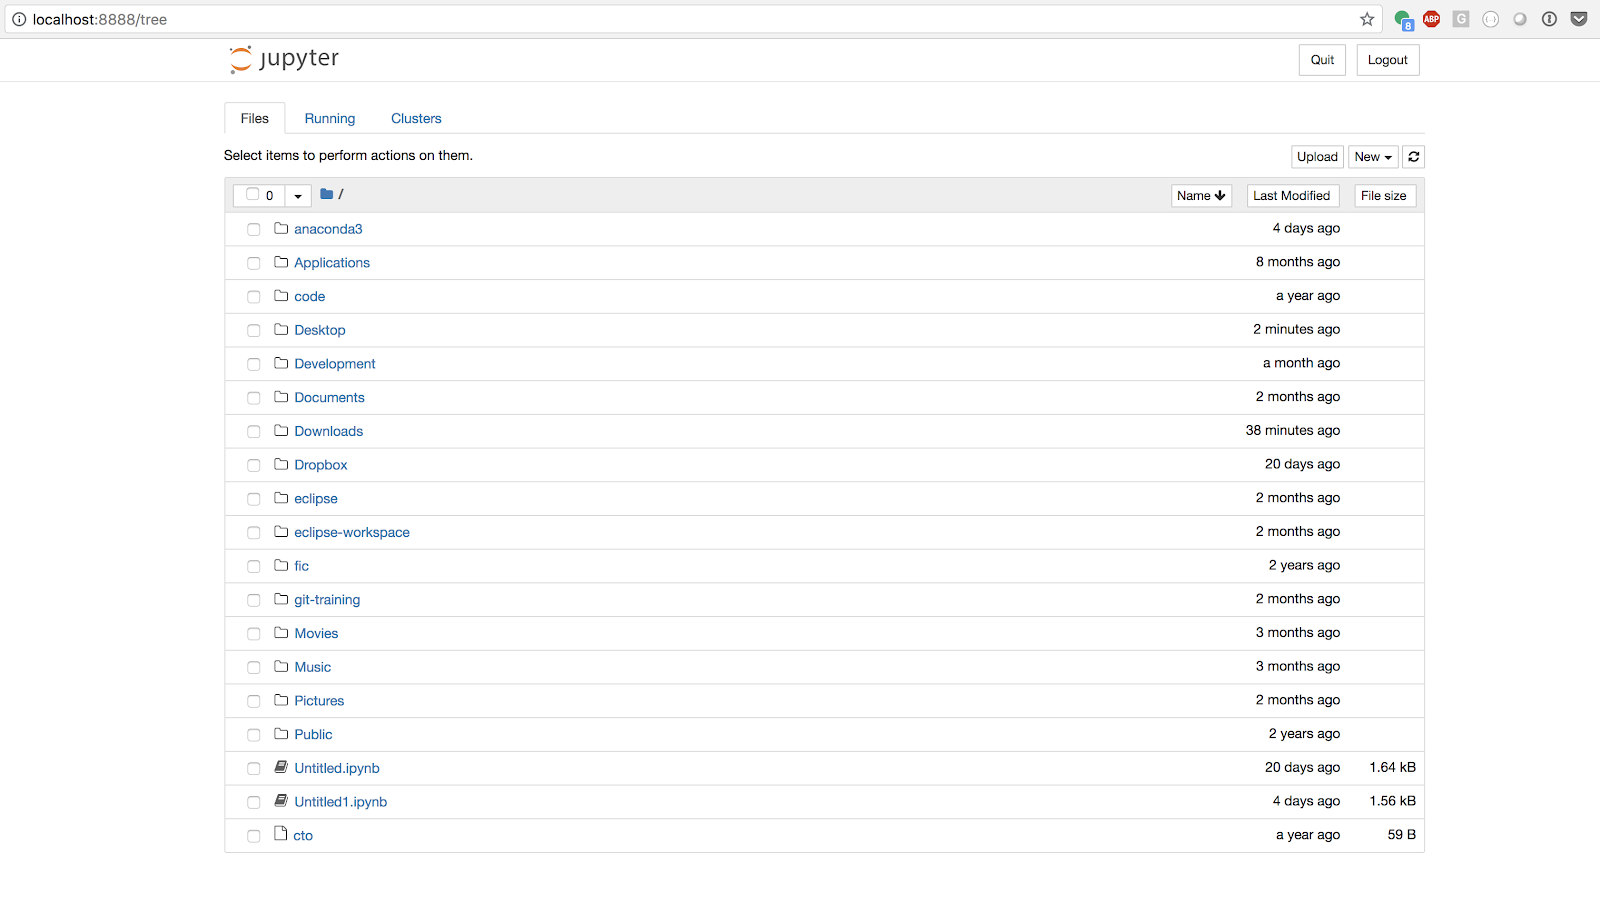
Click on the “New” button in the top right corner.
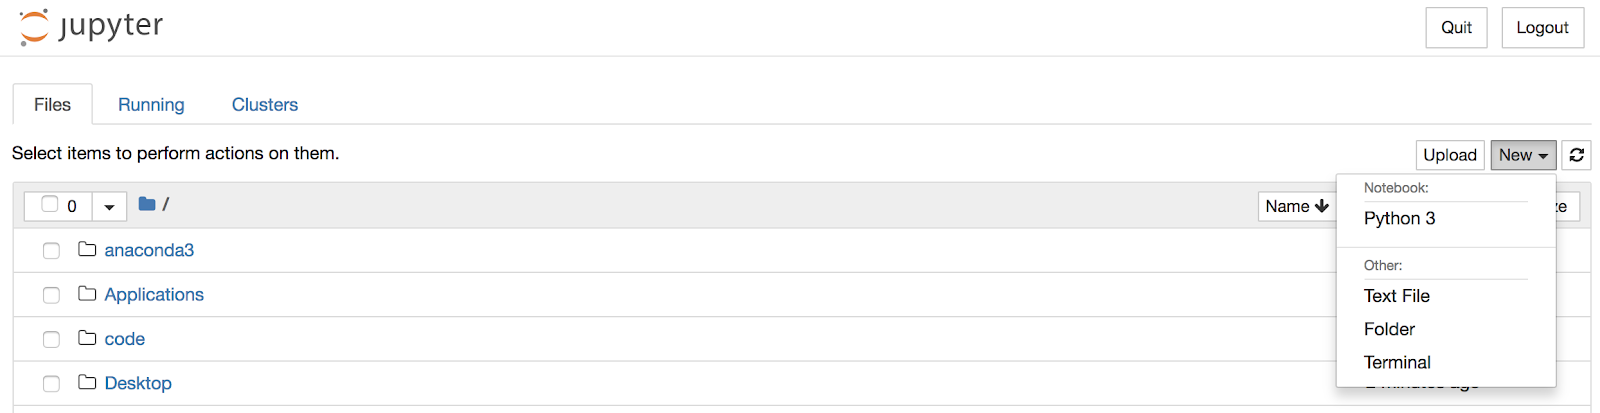
And select “Python 3” from the drop-down list.
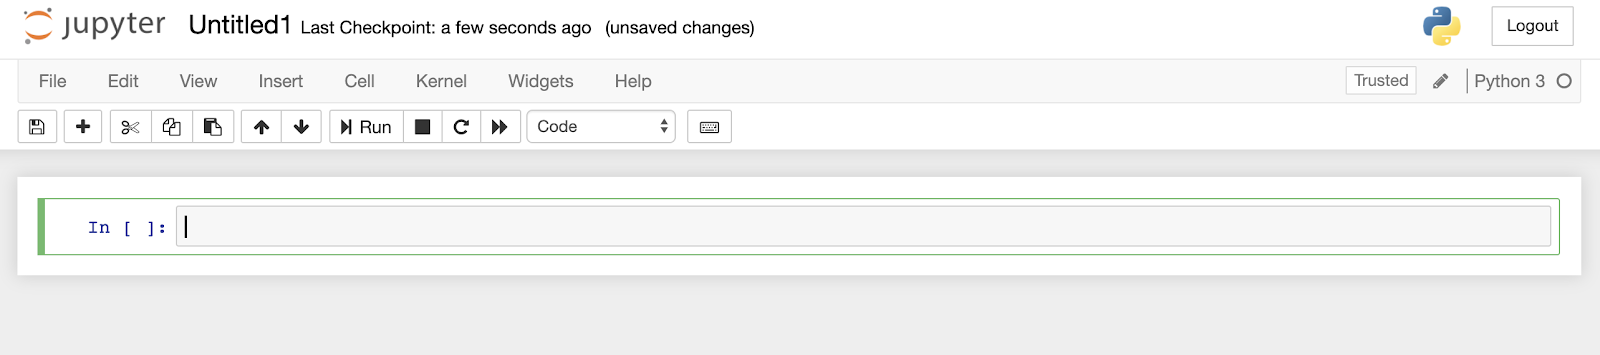
When you do, you’ll see a new notebook in your browser window that looks something like this:
To make sure it’s working, click in the cell and type the following:
import sys
print(sys.version)
Then hold down the shift key and hit enter to run the code in the cell. You should see an output like this:
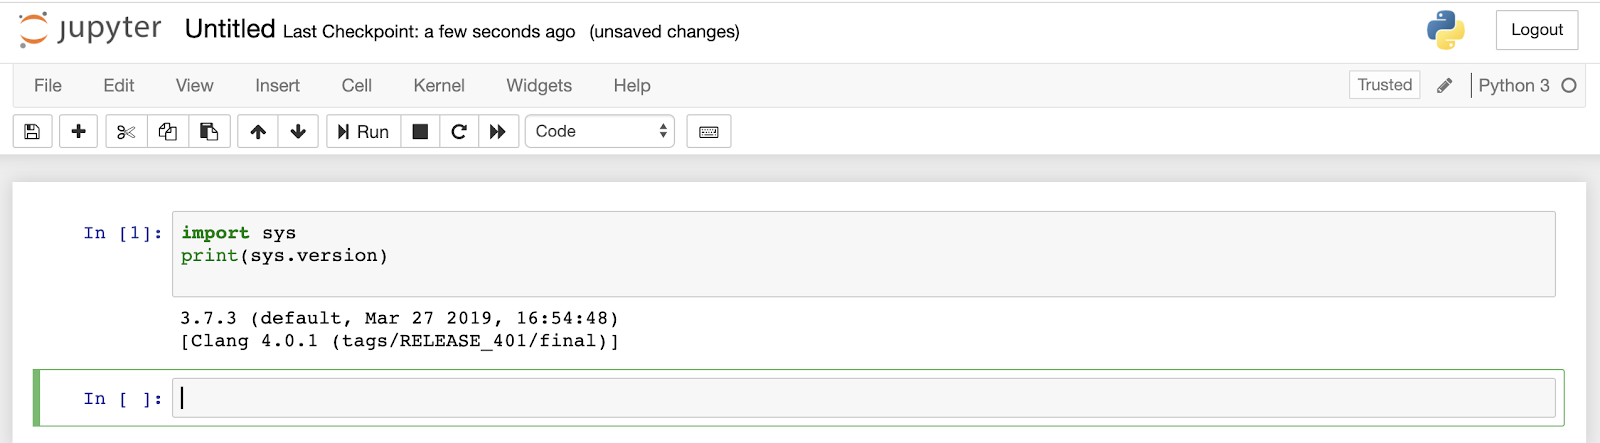
Don’t worry if the version number or date is slightly different. If you get a similar output (something that isn’t an error message), congratulations! You’ve got Anaconda, Python, and the Jupyter notebook installed successfully!
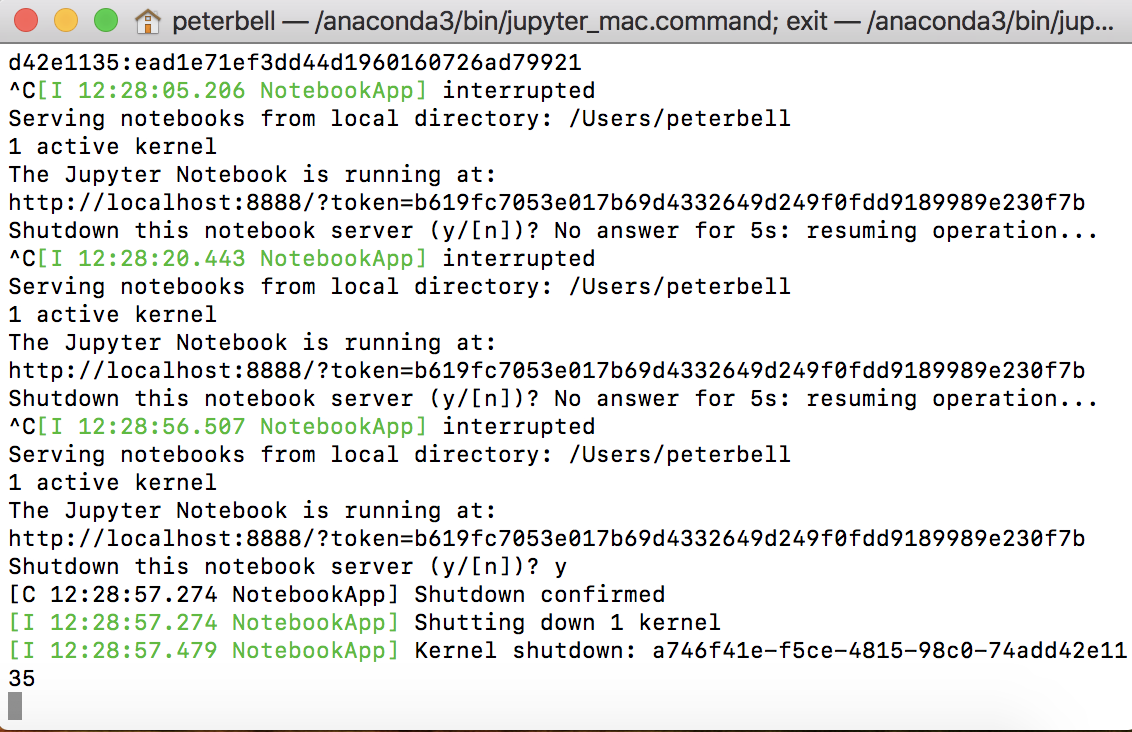
To shut down Jupyter notebook, just close the tabs in your browser containing the notebook and the list of notebooks. On a Mac, you should also close down the terminal window. Start by clicking on the terminal window and then hitting “ctrl-C”. You’ll be asked to confirm that you want to shut down, so hit “y” and then the enter key to confirm. Finally, close the terminal window by hitting “Command-w.”
Next steps
Congratulations! If you’ve got this working, you now have everything you need on your computer to start to work on data science projects locally. Keep an eye out for future articles in this series where we’ll get some hands on experience with key stages of the data science process – from web scraping and data clean up to modeling and visualizations. In the meantime, if you’d like to get some more hands on data science experience, feel free to check out our free data science bootcamp prep program!
Disclaimer: The information in this blog is current as of August 13, 2019. Current policies, offerings, procedures, and programs may differ.